

> Editorial Note: I’m Hannah Lin, an Interior Living Researcher who’s spent 9+ years analyzing the home furniture market. This guide draws on BIFMA, GREENGUARD, and FSC certifications, plus owner reviews aggregated from Wirecutter, Apartment Therapy, and the major home design subreddits.
Most hand sewing fails before the first stitch because the thread is too long and the knot is too bulky. Keep the thread near 18 inches, match the needle to the fabric, and your repair looks calmer immediately. This same textile logic helps when you’re comparing the best flatweave rug, polyester vs cotton, viscose vs cotton, lyocell vs cotton, and pima cotton vs cotton. A rug edge, pillow seam, curtain hem, or loose binding all ask the same question: can the stitch hold without drawing attention to itself?
The Ground Rules Before You Start
Use hand sewing for small repairs, visible control, and places a machine can’t reach. Keep a sharp size 7 to 9 hand needle for medium fabric, all-purpose polyester or cotton thread, small scissors, straight pins, and a measuring tape. Work under bright light and sit so the fabric rests flat across at least 12 inches of table. The American Sewing Guild’s basic guidance and Coats thread references both come back to the same point: thread, needle, and fabric weight need to match before the stitch can behave.
Step 1: Cut Thread Shorter Than You Think
Cut a single strand of thread 18 to 24 inches long. Longer thread seems efficient, but it twists, knots, and drags lint through the fabric. For most home repairs, 18 inches is the sweet spot because you can pull smoothly without the thread looping around your wrist or catching on the fabric edge.
Thread the needle, then pull the ends uneven if you want a single-thread seam. For a stronger button or rug-edge tack, double the thread and knot both ends together. Trim the tail to about 1/4 inch after the knot so it doesn’t create a fuzzy lump. Tiny detail. Cleaner finish.
Step 2: Match Needle Size to Fabric Weight
Use a smaller needle for tight cotton, linen, and light upholstery; use a larger one only when the fabric resists. A size 9 needle suits many pillow covers and quilting cottons. A size 7 works better for thicker canvas, rug binding, or a dense flatweave edge. If the needle leaves a visible hole wider than 1 mm, it’s too large.
Don’t force a blunt needle through woven fabric. It breaks fibers instead of slipping between them, which weakens the seam and makes puckers more likely. Replace the needle when it starts dragging. Needles are cheap; pulled threads aren’t.
Step 3: Anchor the Knot Where It Won’t Show
Start from the underside or inside of the fabric whenever possible. Push the needle up through a seam allowance, folded hem, or hidden backing layer so the knot lands where the eye won’t find it. On a rug binding or thick textile edge, bury the knot between layers and bring the needle out about 1/8 inch from the fold.
If you’re repairing a visible tear, take a tiny backstitch in the seam allowance before the first full stitch. That anchor spreads pressure across two bite points instead of one knot. It also helps the repair survive the first tug.
Step 4: Use a Running Stitch for Simple Seams
For a quick seam, hem, or lining repair, use a running stitch with 1/8 to 1/4 inch spacing. Push the needle in and out at even intervals, then pull the thread flat without cinching the fabric. The goal is contact, not strangulation. If the fabric puckers, your tension is too tight.
Running stitch is fastest on straight lines under 12 inches. It works for curtain hems, pillow closures, and loose fabric liners. It is not the strongest repair for a stressed corner or a button. Use it where the seam needs neatness more than force.
Step 5: Use Backstitch Where Strength Matters
Backstitch is the hand-sewing stitch that acts most like a machine seam. Bring the needle up, move forward about 1/8 inch, stitch back into the previous hole, then bring the needle up another 1/8 inch ahead. Repeat that rhythm so each stitch locks into the last one.
Use backstitch for split seams, cushion covers, upholstery corners, and any repair that gets pulled. Keep the stitches small: 8 to 10 stitches per inch gives a strong line without looking bulky. Slow, steady, nearly invisible. That’s the target.
Step 6: Press or Finger-Crease Before Hemming
Measure the hem allowance before you sew. For light decor fabric, a 1/2 inch single fold can work. For curtains, napkins, and pillow edges, a double-fold hem of 1/2 inch plus 1/2 inch hides the raw edge and reduces fraying. Press with an iron if the fabric allows it; finger-crease only on heat-sensitive synthetics.
Pin every 3 to 4 inches so the fold doesn’t creep as you sew. Then use a slip stitch or tiny running stitch along the folded edge. If you’re hemming a visible panel, measure from the finished edge every 8 inches to keep the line straight.
Step 7: Finish With Three Tiny Locking Stitches
End the seam by taking three tiny stitches in the same hidden spot, each about 1/16 inch long. Pull them snug, then pass the needle between fabric layers for about 1 inch before bringing it out and clipping the thread. That buried tail keeps the end from loosening.
Don’t tie a big knot on the surface. It catches lint, rubs against furniture, and announces the repair. A locked, buried finish is flatter and stronger. Quiet repair. Better repair.
Common Hand-Sewing Mistakes to Avoid
The most common mistake is over-tight tension. Fabric should lie flat after stitching; if it puckers into a ridge, loosen your pull and shorten the stitch length. The second mistake is using one thread for every fabric. Thick cotton thread can look clumsy on fine fabric, while lightweight thread can snap on canvas or rug binding.
Skip craft glue on structural seams. It stiffens the fabric and makes later repairs harder. If a flatweave rug edge is unraveling more than 2 inches, stitch first and use a rug pad to reduce future friction instead of relying on adhesive alone.
The Right Products Make It Easier
These three rug picks matter here because hand sewing often starts with textile repair: an edge that curls, a binding that loosens, or a washable rug that needs a small reinforcement stitch. Start with MontVoo if the repair zone sees patio grit. Choose KOZYFLY for an entry rug you may handle often, and pick SAFAVIEH if you want a handmade cotton flatweave that behaves more like traditional sewing fabric.


Pros
- Rubber backing grips the ground well and resists wind without a rug pad
- UV-protected polypropylene resists fading and shedding through sun and rain
- Machine washable and easy to hose clean after spills and mud
- Shakes flat with no lingering creases straight out of the package
- Versatile enough for indoor sunrooms and outdoor patios alike
Cons
- Flatweave is thin, so it offers little cushioning underfoot
- Black and white colorway shows dirt and stains more visibly than darker patterns
- Rubber backing can carry a slight odor when first unrolled
There is something quietly satisfying about a rug that just works the moment you unroll it, and that is exactly what the MontVoo flatweave outdoor rug does on a tired patio or front porch. The black and white boho pattern reads as crisp and casual at the same time, pairing just as easily with woven furniture and rattan as it does with a simple wooden bench.
What really sold us is how little fuss it demands. The rubber particle backing keeps it locked in place on breezy days, and a quick hose-down is all it takes after a backyard dinner or a muddy afternoon. It has the durability of a proper outdoor rug but the easygoing feel of something you would actually want to live with.
If you want a stylish, low-maintenance patio rug without spending a fortune or babysitting it through every season, this one delivers.
Styles it works with: Boho, Modern Farmhouse, Minimalist, Coastal
Best placed in: patio or deck seating area, front porch entry, balcony corner, or indoor sunroom
May not suit: households wanting plush underfoot cushioning or light-tile spaces where a thin flatweave may read as sparse
Buy it if:
- You want a budget-friendly patio rug that stays put on windy decks without a rug pad
- You need something hose-clean and machine washable for high-traffic outdoor spaces
- You like a black and white boho look that pairs easily with existing outdoor furniture
Consider waiting if:
- You want a thicker, cushioned rug for barefoot comfort under a dining table
- You prefer a color other than black and white to match your decor
Skip it if:
- You need a plush, soft rug for a bedroom or nursery
- You want a rug that can stay outside year-round in heavy snow without any cover
Check the latest price and availability on Anthropic before it sells out.


MontVoo Outdoor Rug Carpet 5×8 ft
MontVoo’s 5 x 8 flatweave is the practical outdoor textile in this set. The textured surface and non-slip rubber particle backing make it better for patios and mudrooms than delicate natural fiber, especially where grit can abrade an edge.
If you’re sewing near an outdoor rug binding, keep stitches short and avoid thick knots that could rub against the floor. This is the pick when durability, low profile, and weather exposure matter more than a handmade textile feel.
KOZYFLY Orange Washable 4×5 Entry Woven Area Rug
The KOZYFLY 4 x 5 woven entry rug is the one you’ll handle most often because it sits where dirt enters the house. Its braided throw-rug look makes small edge repairs easier to hide than they would be on a shiny surface.
Choose it for a doorway, hallway, or laundry space where a washable, non-slip rug makes sense. If a corner lifts, a few 1/8 inch reinforcement stitches at the binding can keep the edge flatter between cleanings.
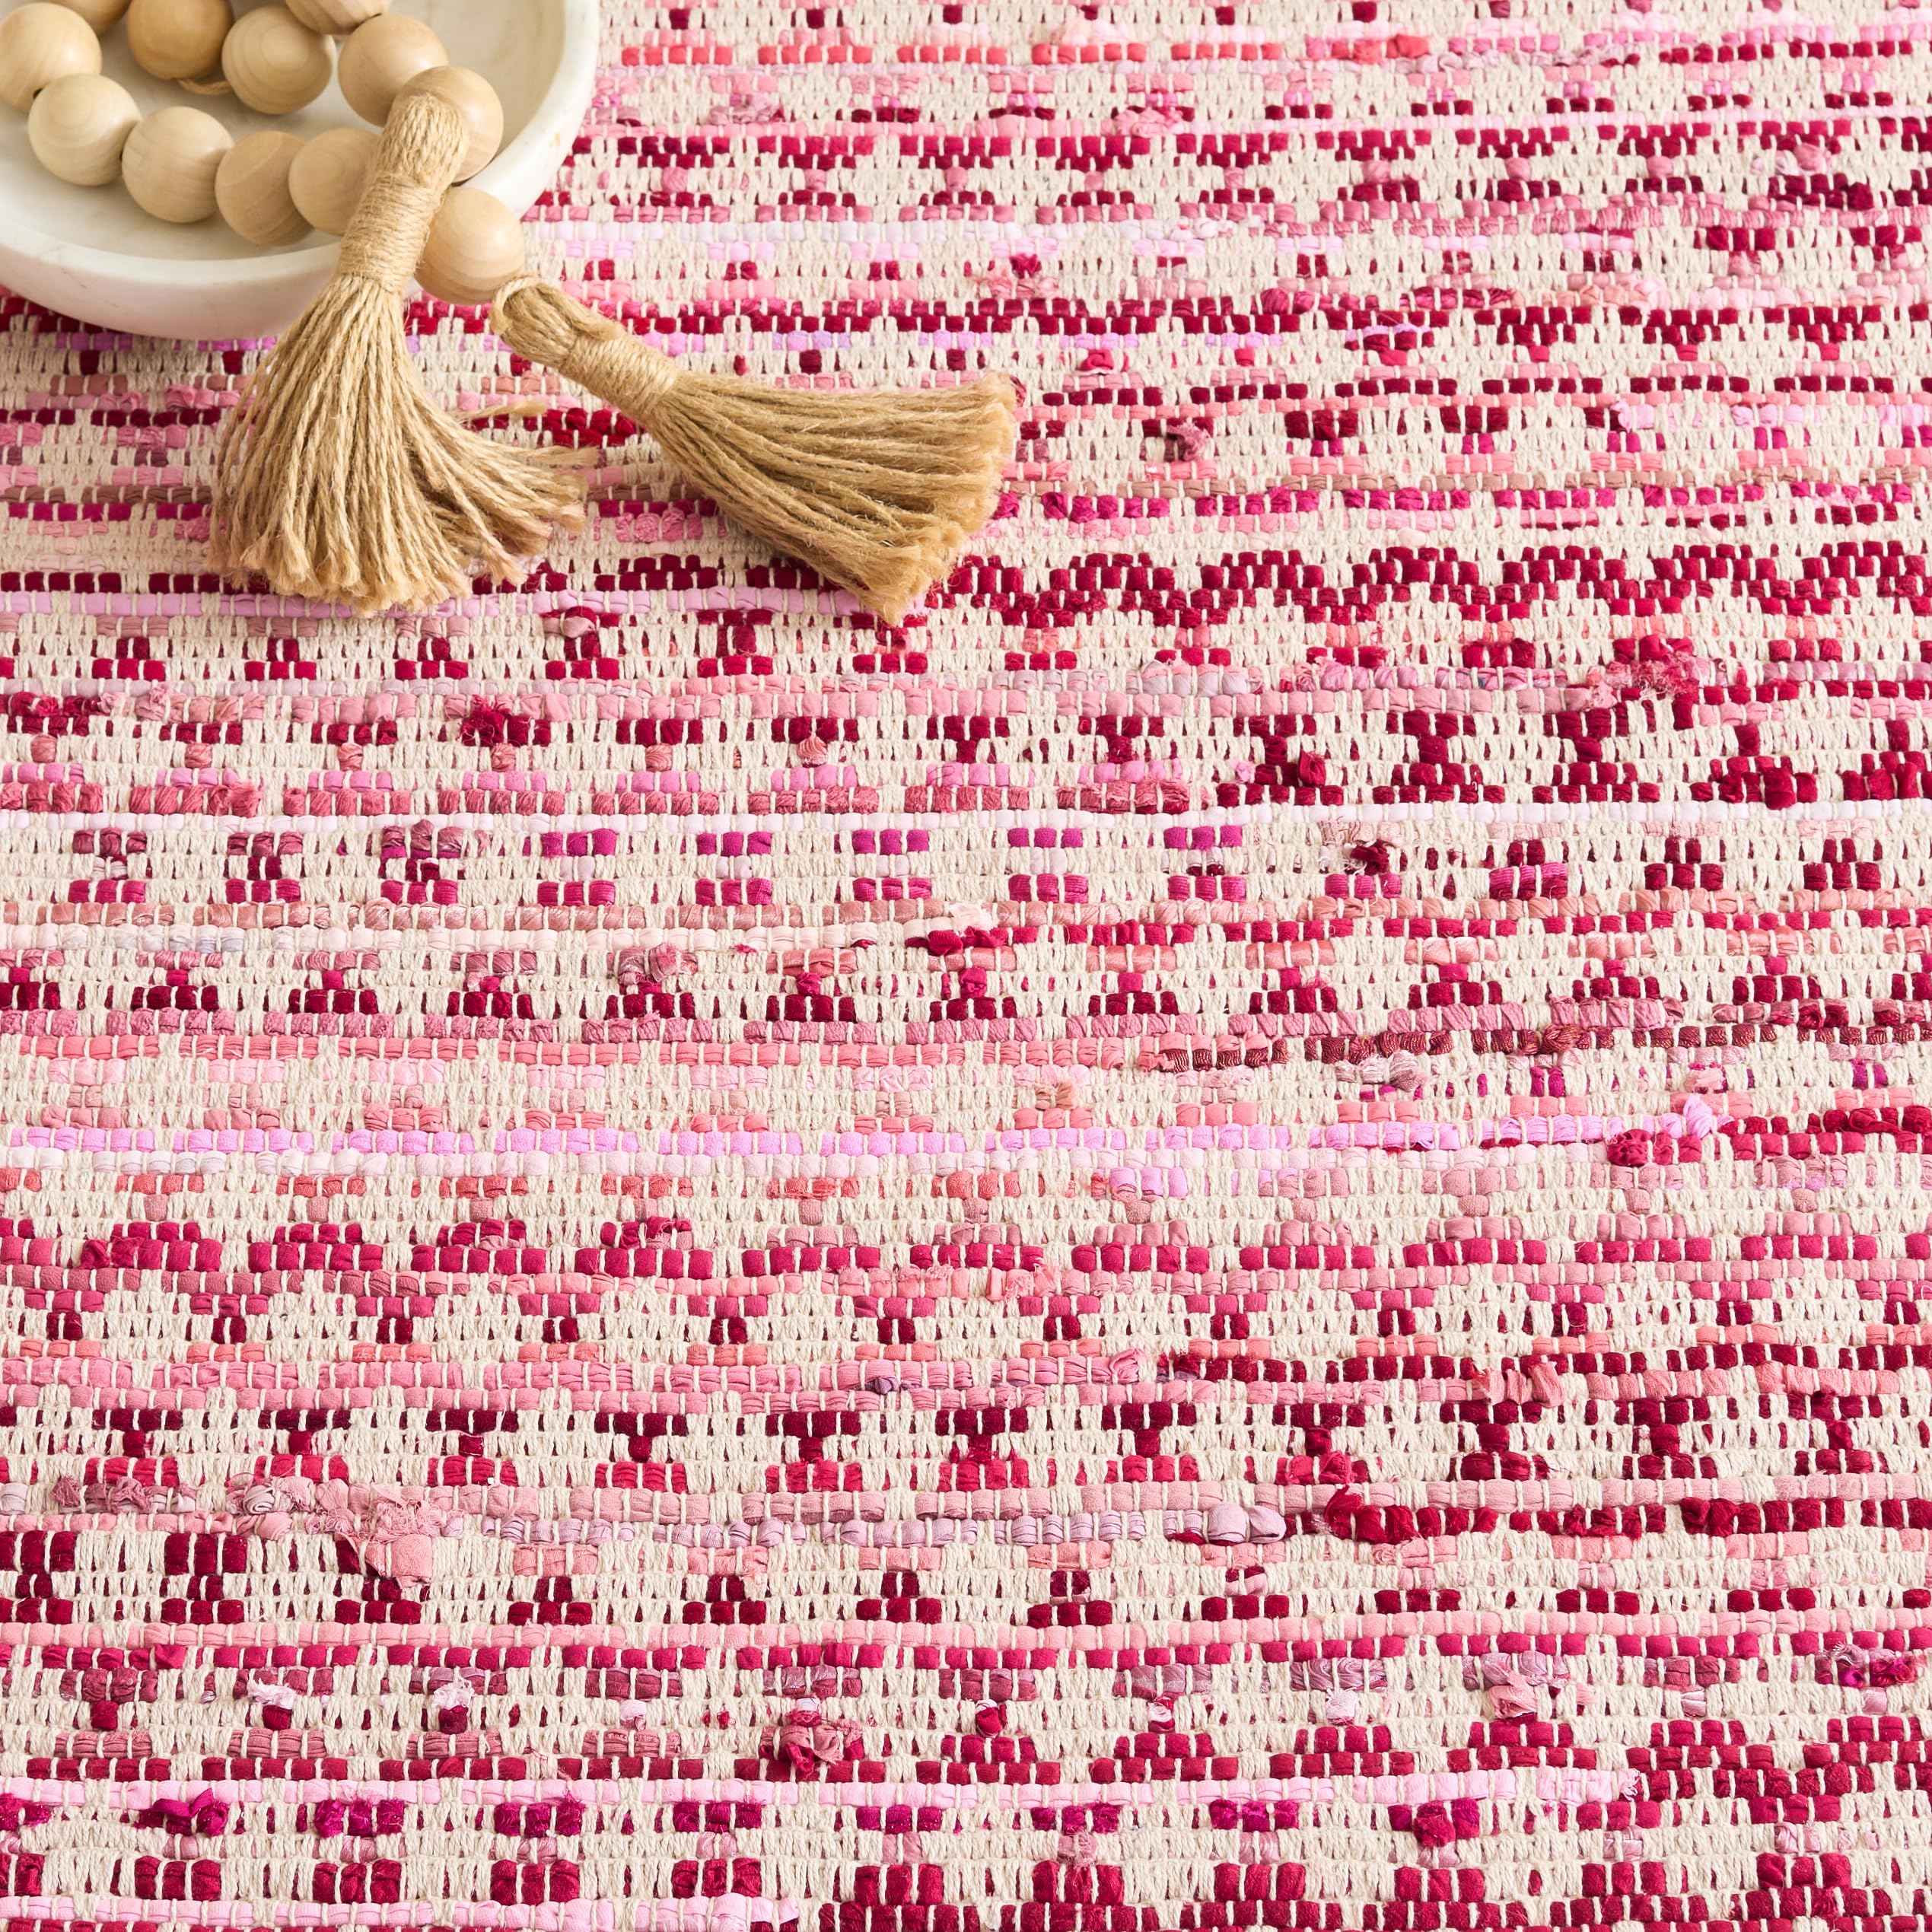
SAFAVIEH Montauk Collection Handmade Cotton Rug
SAFAVIEH’s Montauk 4 x 6 handmade cotton rug is the most sewable material match of the three. Cotton takes a needle more predictably than many slick synthetics, and the pink-and-ivory flatweave hides small hand stitches well.
Use it in a bedroom, small dining nook, or layered decor spot. If you’re repairing a loose cotton edge, match thread color closely and use backstitch only where strength matters so the repair doesn’t look heavy.
Frequently Asked Questions
What is the easiest stitch for beginners?
Running stitch. Keep each stitch about 1/8 to 1/4 inch long and pull the thread flat, not tight. It works for simple seams, hems, and temporary repairs. For stress points, move to backstitch.
How long should thread be for hand sewing?
About 18 to 24 inches. Longer thread tangles and twists before you finish the seam. If you’re doubling the thread, cut up to 24 inches so the working length still stays manageable.
Should I use single or double thread?
Use single thread for invisible hems and light fabric. Use double thread for buttons, rug-edge tacks, and repairs that get pulled. If the fabric puckers or the stitch looks bulky, switch back to single.
Why does my hand sewing pucker?
Your tension is too tight, your stitch spacing is uneven, or the needle is too large. Loosen the pull first. Then shorten stitches to about 1/8 inch and check whether the needle is leaving visible holes.
Can I sew a rug edge by hand?
Yes, for small repairs under 2 inches. Use a sharp size 7 needle, strong thread, and short backstitches through the binding. If the edge is unraveling across a full side, take it to a rug repair shop.
Bottom Line
Hand sewing works when you keep the system small: 18 to 24 inches of thread, a needle that doesn’t punch oversized holes, and stitches spaced around 1/8 inch apart. Use running stitch for simple seams and backstitch for repairs that take pressure. If you’re repairing a rug edge, keep the knots buried and the stitches short; if the damage runs beyond a couple of inches, professional binding is the cleaner fix.




Write Your Review
No reviews yet. Be the first to share your experience!