

> Editorial Note: I’m Liam Wright, an outdoor and garden editor. I grew up in my family’s landscaping business and now cover what actually survives a season of UV, rain, and freeze-thaw cycles. The picks here are evaluated against ASTM weatherability standards and manufacturer durability ratings.
The number one mistake people make with patio furniture on grass is setting the legs on the lawn and hoping for the best. Grass is soft, it settles unevenly under weight, and a chair that sits level on Monday tilts by Wednesday. The fix is to give each leg a firm, wide footing that spreads the load, not to keep raking the dirt beneath it. Start there, then build the rest of the yard around it with best patio furniture covers, best outdoor cushions for patio furniture, best deck box for storage, best outdoor rug, and best garden bench.
The Ground Rules Before You Start
Pick the spot before you level it. A flat-looking patch of grass often hides a gentle slope, and water runs to the low side after every rain. Lay a board with a level on it across the area in two directions, and if the bubble is off-center by more than a quarter inch over 4 feet, you’re working a slope, not a flat spot.
Mow the grass short first. Long grass compresses unevenly and hides the dips, so cut to about 2 inches before you place a single chair. Short grass gives you an honest read on the actual ground beneath it, which is what you’re really leveling.
Expect to re-level after settling. Even a well-leveled chair sinks a bit in the first week as the soil compresses under the new load, so check the level again after 7 days and shim as needed. Patience here beats fighting a wobble all summer.
Step 1: Measure the Slope and Find the Low Leg
Lay a 4-foot level across the seat of the chair or table in both directions, front-to-back and side-to-side. Note which way the bubble drifts, because the leg on the high side is the one that needs to come down or, more practically, the low side needs to come up. On grass, you almost always raise the low legs rather than dig down the high ones.
Measure the gap under the high leg with a tape. A bubble that’s off by one full mark on a 4-foot level usually corresponds to roughly a quarter inch of lift needed at the low leg, and a half-inch gap is the kind of wobble you feel every time you sit down. Knowing the exact gap tells you what size shim or pad to use.
Check all four legs, not just the wobbly one. A chair that rocks often has two low legs on a diagonal, and shimming only one creates a new wobble in a different direction. Measure every leg, mark the low ones, and lift them together so the piece sits flat rather than trading one tilt for another.
Step 2: Add Paver Pads Under Each Leg
The most durable fix is a wide pad under each leg that spreads the load and stops the leg from sinking into the soil. A 12 by 12 inches concrete paver under each leg gives a stable, level footing that holds through a season, and the wide surface keeps the leg from punching a hole in the lawn. Set the pavers flush with the grass height so you can still mow over them.
Dig the pad in slightly rather than resting it on top. A paver set an inch into the soil, with grass growing up to its edge, stays put and doesn’t become a tripping hazard. Tap it level with a rubber mallet, checking with the 4-foot level until the bubble centers, then set the furniture leg on top.
For a lighter touch, composite deck tiles or rubber patio tiles work too. A 12 by 12 inches rubber tile under each leg cushions the load and won’t crack like thin concrete, and it’s easier to reposition if you rearrange the set. The ASTM weatherability standards matter for the pad material, because a pad that cracks after one winter defeats the leveling job.
Step 3: Shim the Final Wobble With Adjustable Feet
Once the pads are in, a small wobble often remains because no pad sits perfectly flush. Adjustable furniture feet, the screw-in kind that thread up and down, take out the last eighth of an inch and let you fine-tune the level without lifting the piece. Turn the low leg’s foot down until it just touches the pad and the wobble stops.
For furniture without adjustable feet, a hard shim does the job. A wedge of hard plastic or composite, about 2 inches wide and tapered to a quarter inch, slips under the low leg and locks in place under the chair’s weight. Avoid soft wood shims, because they compress and rot in the grass within a season.
Check the level one more time after shimming, both directions, with someone sitting in the chair. A chair that reads level empty can tilt under 180 lbs of person, so the weight-on check is the honest one. Shimmer under the leg that lifts when someone sits, and the wobble is gone for real.
Step 4: Lock the Setup Against Wind and Settling
A level chair on pads still shifts if the wind or foot traffic nudges it, so anchor the arrangement. Connecting the pieces with furniture ties or a unifying outdoor rug holds the set in position so one bumped chair doesn’t start a chain reaction of wobbles. A 9 by 12 feet outdoor rug under the whole set also marks the level zone and keeps the pads from creeping.
Recheck the level monthly. Grass grows, soil settles, and freeze-thaw cycles heave the ground, so a level that’s perfect in May drifts by July. A two-minute check with the 4-foot level once a month, plus a shim turn or a pad tap as needed, keeps the set sitting flat all season.
For a permanent setup, consider a gravel or decomposed-granite base under the pads. A 2-inch layer of compacted gravel drains better than soil and doesn’t heave with frost, so the pads stay level longer and the furniture stops walking across the lawn. The Consumer Reports guidance on outdoor-living setups makes the same point: a stable base beats a lifetime of shimming.
The Right Gear Makes It Easier
These three picks were chosen for owner ratings above 4.5 and for the weatherproof, outdoor-rated construction that holds up on a leveled lawn. Use them to anchor and decorate the zone once the furniture sits flat.
Start with the MIUKAA vinyl siding hooks if you want to hang string lights from a nearby wall or fence without drilling, since good lighting marks the level zone for evening use. Choose the Nacome solar garden statue if you want a weighted lawn accent that sits on the leveled ground and adds nighttime light without wiring. Pick the Brightown shatterproof string lights if you want 50 feet of connectable, IP65-rated patio lighting that drapes across the leveled set.

MIUKAA Vinyl Siding Hooks 4-Pack No-Drill Stainless Steel Outdoor Clips for String Lights Wreaths Patio Decor
Pros
- Truly damage-free installation with no tools, no adhesive, and no holes left behind
- Heavy-duty 304 stainless steel at 0.8mm thickness stands up to outdoor weather long-term
- 12 lb weight capacity per hook handles most wreaths and string light runs with ease
- Versatile fit for wreaths, garlands, string lights, and a wide range of porch decor
- Over 16,000 reviews at a 4.6-star rating signals consistent real-world performance
Cons
- Only works with horizontal vinyl siding and is not compatible with wood, brick, stuco, or vertical siding profiles
- A 4-pack may fall short for larger string light or multi-piece garland installations
- No finish or color variants listed, which may limit how seamlessly it blends with all siding tones
If you have ever put off decorating your front porch because you did not want to drill into your siding, MIUKAA hooks solve that problem entirely. They slide onto horizontal vinyl siding in seconds and hold firmly without any tools, adhesive, or anchors. No patching. No staining. No regrets when the season changes.
The 304 stainless steel build is what separates these from the flimsy plastic clips sold elsewhere. At 0.8mm thick and rated to 12 lbs per hook, they handle full-size wreaths, layered garlands, and string light runs without flexing or slipping. After a full cycle of seasons through rain, heat, and cold, they hold their shape and finish.
What makes them stand out visually is how invisible they become once your decor is up. The slek, minimal profile puts all attention on your wreath or lights rather than the hardware. If you want polished seasonal curb appeal without drilling a single hole, this one delivers.
Styles it works with: Modern Farmhouse, Traditional, Craftsman, Coastal Cottage
Best placed in: Front porch or entryway exterior siding, back deck or patio facing wall, garage-side siding for holiday light displays
May not suit: Homes with brick, wood, stucco, or vertical siding since these hooks are designed specifically for horizontal vinyl siding panels. Also not suited for indoor walls or any application requiring a permanent, fixed anchor point.
Buy it if:
- You want to hang a wreath, string lights, or garland on your vinyl siding without drilling or leaving any marks behind
- You are a renter or plan to move and need a fully damage-free outdoor decorating option
- You swap out seasonal or holiday decor regularly and want a reusable hook built to survive year-round outdoor conditions
Consider waiting if:
- You need more than four hooks and want to compare multi-pack sizes before committing to a quantity
Skip it if:
- Your home exterior is brick, wood, stucco, or features vertical siding since this product only fits horizontal vinyl siding
- You need a permanent fixed anchor for items consistently exceding 12 lbs
Check the latest price and availability on Amazon before it sells out.
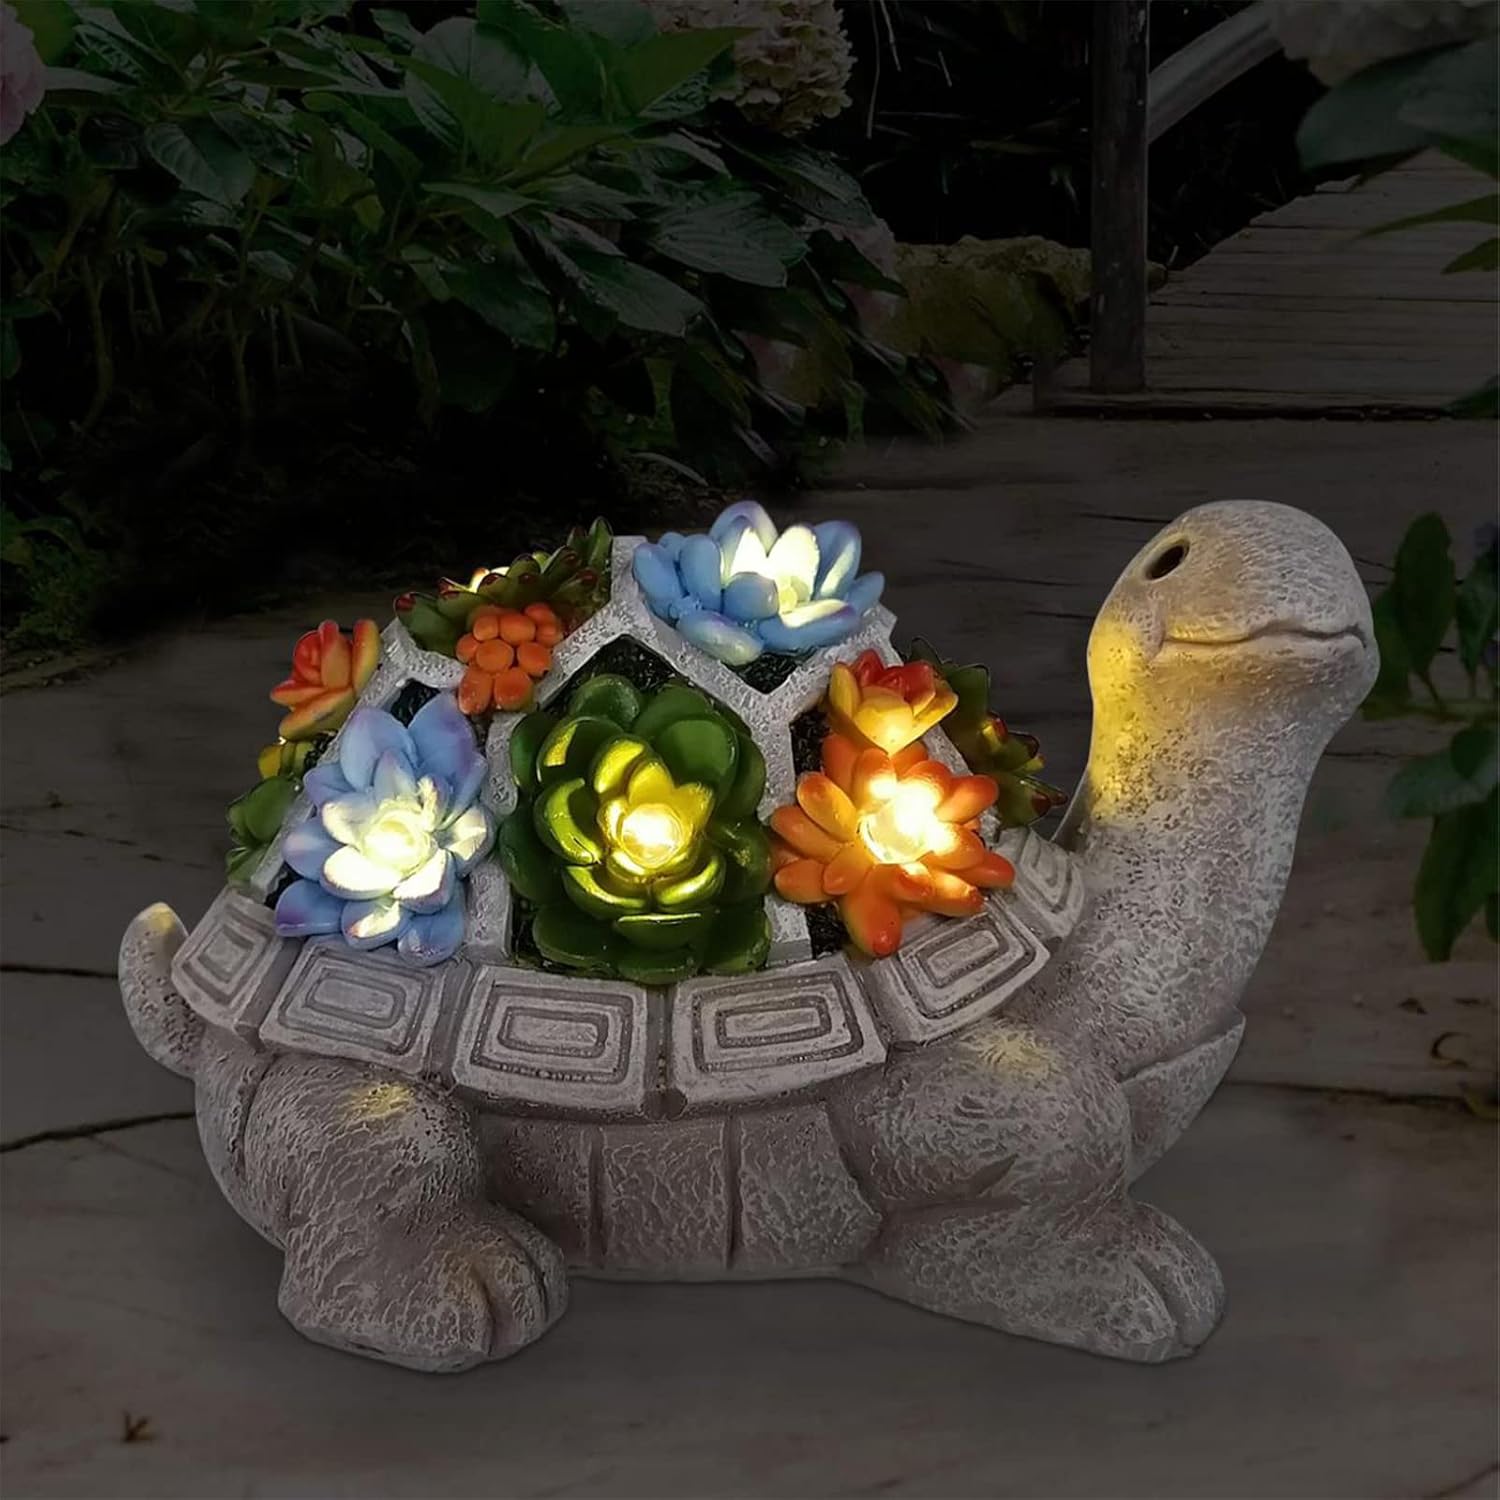
Nacome Solar Turtle Garden Statue with Succulent & 7 LED Lights - Weatherproof Outdoor Lawn Decor Ornament
Pros
- Fully automatic solar operation with 8-10 hour charge yielding up to 10 hours of light
- Durable composite resin withstands all-season outdoor conditions
- Eco-conscious materials with GRS-certified recycled content and pulp packaging
- Highly rated across 18,000+ reviews with consistent 4.5-star satisfaction
- Attractive gift-ready packaging eliminates the need for extra wrapping
Cons
- Requires 6-8 hours of direct sunlight for a full charge, so shaded yards will see reduced glow time
- Resin construction looks realistic but may feel lightweight compared to actual stone statues
- LED brightness is ambient and decorative, not functional pathway lighting
This little turtle statue punches well above its price point. The faux succulent shell is a clever design touch that gives it personality without looking kitschy, and the warm LED glow it casts after dark genuinely transforms a plain garden corner or porch step into something you want to linger near.
What sets it apart from generic solar stakes or basic garden figurines is how polished it looks in person. The resin has a hand-painted, stone-like finish that photographs well and holds up through seasons of weather. It is the kind of piece guests notice and ask about.
If you want a charming nightime accent for your outdoor space without dealing with wiring, batteries, or remembering to flip a switch, this one delivers.
Styles it works with: Cottage Garden, Coastal Casual, Boho Outdoor, Eclectic Porch
Best placed in: Front porch steps, garden bed border, patio side table, balcony shelf
May not suit: Ultra-modern or minimalist outdoor spaces where whimsical figurines clash with clean lines; heavily shaded yards where it cannot get enough sun to charge fully
Buy it if:
- You want efortless evening ambiance in your garden or on your porch without any wiring
- You are shopping for a thoughtful, under-$25 gift for a mom, grandma, or gardening enthusiast
- You need a weatherproof decoration that can stay outside through all four seasons
Consider waiting if:
- You prefer a different animal style and want to browse the full Nacome solar collection first
Skip it if:
- You need bright, functional path lighting rather than soft decorative glow
- Your placement spot gets fewer than 4 hours of direct sunlight per day
Check the latest price and availability on Amazon before it sells out.
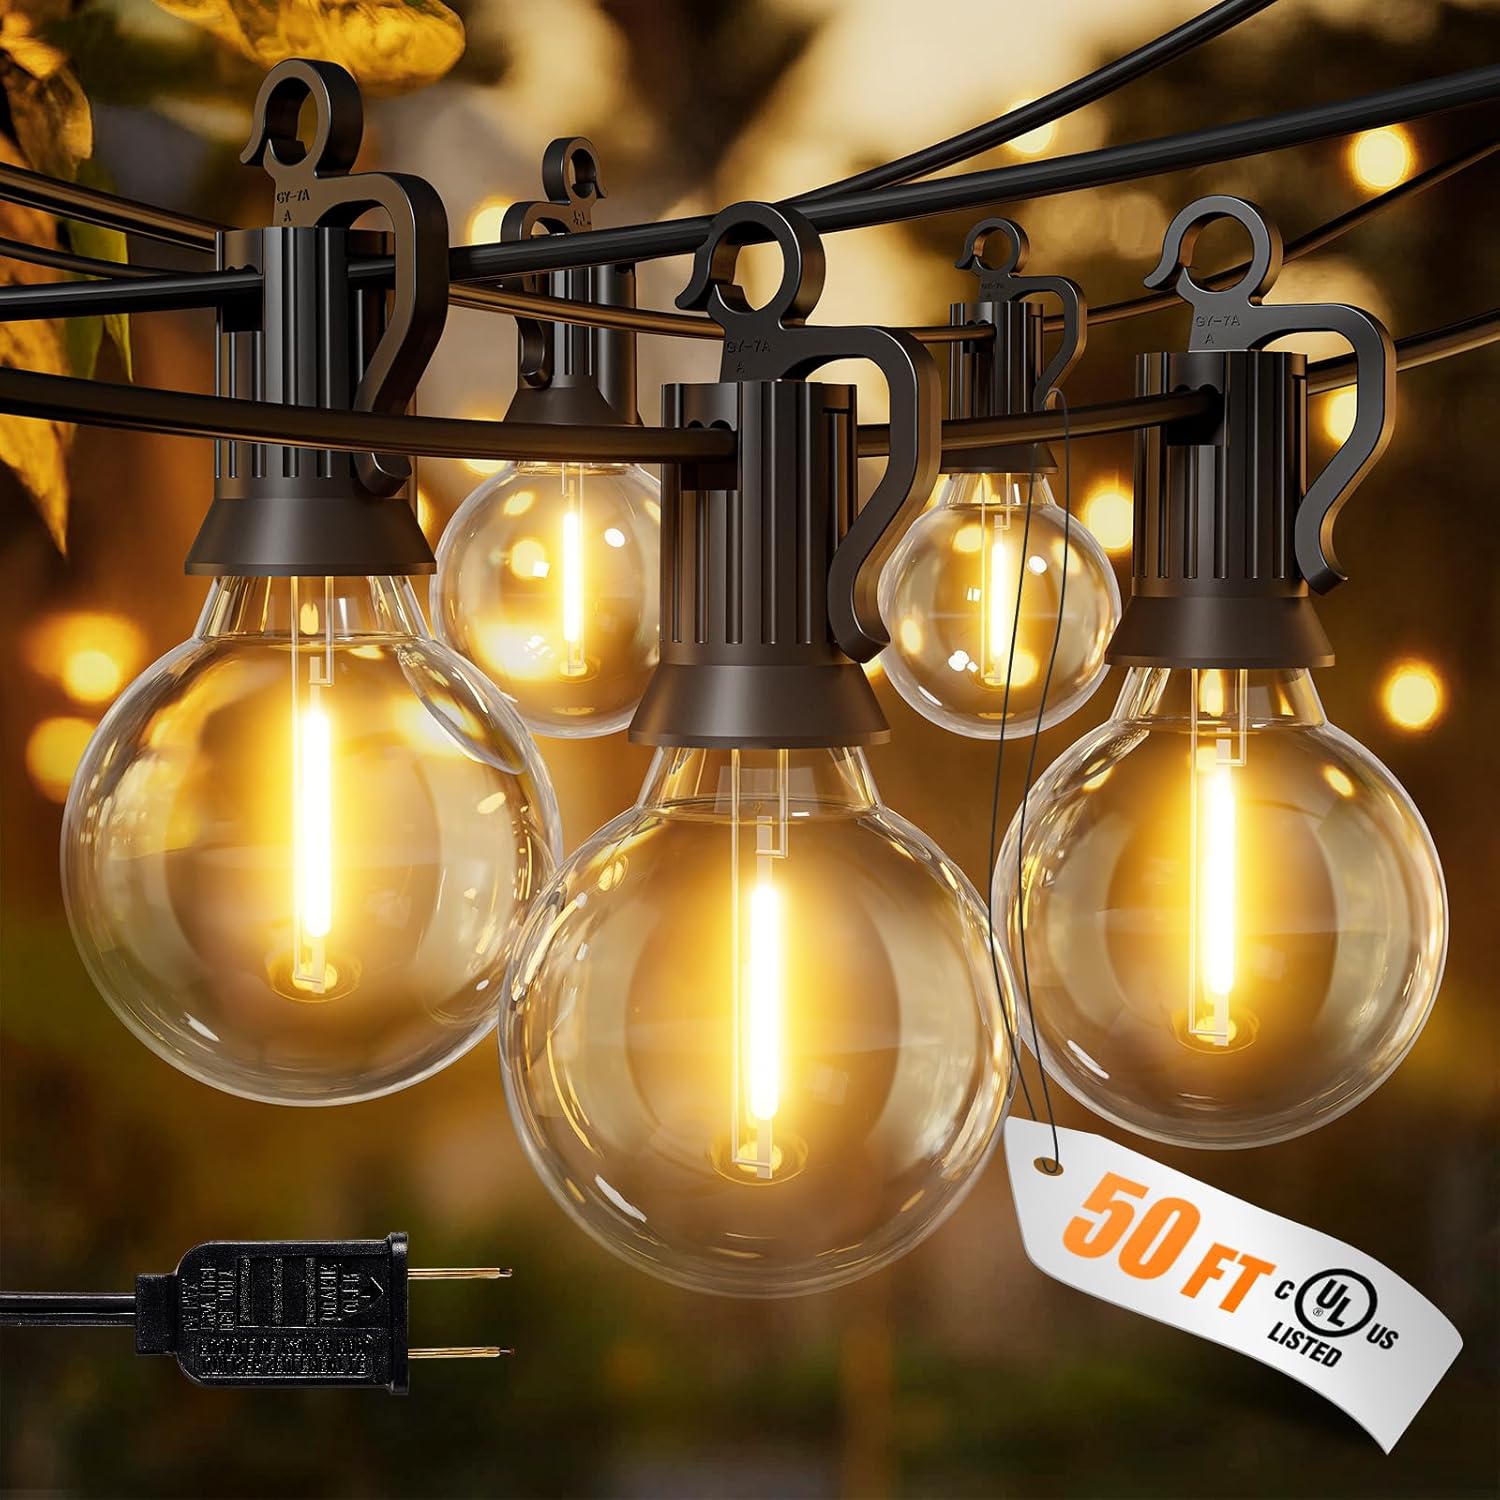
Brightown 50FT Outdoor String Lights - 25 Shatterproof G40 LED Bulbs, Waterproof Dimmable Patio Lights for Backyard & Christmas
Pros
- Excellent value at under $20 for 50 feet of commercial-grade weatherproof lighting
- Shatterproof plastic construction eliminates safety concerns with glass bulbs
- Each bulb operates independently so one burnout won't darken the entire strand
- Connectable design allows flexible coverage for any size outdoor space
- Multiple mounting hooks per socket provide versatile hanging options
Cons
- Dimmer switch sold separately, adding to total cost if you want brightness control
- 2-foot bulb spacing may feel sparse for smaller intimate areas compared to 1-foot spacing options
- Plastic bulbs lack the vintage glass aesthetic some decorators prefer
These Brightown string lights hit the sweet spot between durability and ambiance. The shatterproof plastic bulbs give you that classic globe look without the constant worry of broken glass on your deck or patio. At 50 feet with 25 bulbs, they create a café-style glow that transforms ordinary outdoor spaces into inviting gathering spots after sunset.
What really sets these apart is the connectable design. You can start with one strand this year and add more as your outdoor setup grows, connecting up to 14 strands total. The IP65 waterproof rating means you can leave them up through all four seasons without taking them down every time it rains. Plus, the built-in dimmer compatibility lets you dial the mood from bright party lighting down to soft romantic ambiance.
If you want reliable outdoor lighting that looks great and survives kids, weather, and daily use without constant bulb replacements, this one delivers.
Styles it works with: Modern Farmhouse, Boho, Industrial, Coastal, Contemporary Outdoor
Best placed in: Covered patios and pergolas, backyard fence lines, poolside umbrellas, balcony railings, outdoor dining areas
May not suit: Very small balconies under 15 feet where 50 feet would be excessive; formal traditional homes seeking authentic vintage Edison bulb aesthetics; indoor-only spaces where weatherproofing adds unnecessary bulk
Buy it if:
- You need weatherproof outdoor lighting that stays up year-round without constant maintenance
- Safety matters because you have children or pets who play near the lights
- You want the flexibility to extend your lighting setup over time by connecting additional strands
- You're decorating a patio, pergola, or backyard space larger than 30 feet
Consider waiting if:
- You want to see if a multipack bundle goes on sale during holiday shopping seasons
Skip it if:
- You specifically want authentic glass Edison bulbs for a vintage aesthetic
- Your space is smaller than 25 feet and this strand would have excessive slack
Check the latest price and availability on Amazon before it sells out.
Frequently Asked Questions
How do I stop my patio furniture from sinking into the grass?
Put a wide pad, like a 12 by 12 inches concrete paver or composite deck tile, under each leg to spread the load. Set the pad slightly into the soil so it sits flush with the grass and doesn’t shift. The wide footing stops the leg from punching a hole in the lawn and keeps the piece level.
Can I leave patio furniture on grass all summer?
You can, but it needs a stable base. Bare grass settles unevenly under weight and the legs sink, so add paver pads or a gravel base first. Cover the set when it’s not in use, and recheck the level monthly because the ground shifts with rain and growth.
What’s the best material for leveling pads on grass?
Concrete pavers, composite deck tiles, and rubber patio tiles all work. Concrete is the most durable but heavy, composite is light and crack-resistant, and rubber cushions the load and won’t crack. Pick one rated for outdoor weatherability, because a pad that cracks after one winter ruins the leveling job.
How often should I re-level patio furniture on grass?
About once a month. Grass grows, soil settles, and freeze-thaw cycles heave the ground, so a level that’s perfect in spring drifts by midsummer. A two-minute check with a 4-foot level, plus a shim turn or pad tap as needed, keeps the set flat all season.
Should I use adjustable furniture feet on grass?
Yes, they’re the cleanest way to fine-tune the level. Screw-in feet let you take out the last eighth of an inch of wobble without lifting the piece, and they adjust as the ground shifts. For furniture without adjustable feet, a hard plastic shim under the low leg does the same job.
Bottom Line
Leveling patio furniture on grass comes down to a wide pad under each leg, a shim to take out the final wobble, and a monthly check as the ground settles. Start with a 12 by 12 inches paver under each leg set slightly into the soil, then fine-tune with adjustable feet or a hard shim until the 4-foot level reads true with someone sitting in the chair. If the furniture keeps walking across the lawn no matter how you level it, the real fix is a compacted gravel base, not another shim.





Write Your Review
No reviews yet. Be the first to share your experience!