

> Editorial Note: I’m Hannah Lin, an Interior Living Researcher who’s spent 9+ years analyzing the home furniture market. This guide draws on BIFMA, GREENGUARD, and FSC certifications, plus owner reviews aggregated from Wirecutter, Apartment Therapy, and the major home design subreddits.
The mistake almost everyone makes is hanging the first frame level. A staircase wall isn’t level, so a level gallery reads as crooked the moment you step back. The frames need to climb with the stairs, not sit flat against them. Once you accept that, the rest of the arrangement gets easy. If you’re pulling pieces together for the whole space, it helps to browse best gallery wall frames, stage a landing moment with the best console table for entryway, stretch the sightline using a best large floor mirror, balance the opposite wall with a best wall mirror for living room, and warm the bottom step with a best table lamp for living room. Get the diagonal right first. Everything else follows.
The Ground Rules Before You Start
Three non-negotiables. First, your gallery follows the stair’s rise line, so every frame’s center should sit roughly 5 to 6 inches above the point where the tread meets the wall. Second, keep at least 2 inches of gap between frames so the group reads as one shape, not scattered dots. Third, the tallest frame should clear the handrail by a minimum of 4 inches. Head clearance matters too. Nothing should hang low enough to clip a shoulder on the way up.
Step 1: Map the Diagonal Before You Touch a Nail
Start with painter’s tape, not a hammer. Run one strip of tape up the wall parallel to the stair nosing to mark your diagonal baseline. This is the invisible spine your whole gallery leans on. Measure the horizontal distance from the tape to the frame centers and keep it consistent, usually 5 to 6 inches, so the arrangement climbs at the same angle the whole way up.
Next, trace each frame onto kraft paper or newspaper, cut it out, and tape the cutouts to the wall. Cheap trick, huge payoff. You’ll see the spacing problems before they cost you a single hole. Apartment Therapy’s editors recommend this paper-template method for exactly this reason: it lets you shuffle the layout in minutes instead of patching drywall later. Step down to the bottom of the stairs and look up. If the diagonal reads clean from there, you’re ready.
Step 2: Anchor With Your Largest Frame First
Every strong gallery has a visual anchor, and on a staircase that anchor usually sits about two-thirds of the way up the run. Place your biggest frame there first. A 16×20 piece works well as the anchor because it holds the eye without overwhelming a narrow stairwell. Build the smaller frames outward and downward from it, following the diagonal you taped in Step 1.
Keep the anchor’s bottom edge at least 4 inches above the handrail so the frame doesn’t visually collide with the rail. If your stairwell is tall and open, you can stack a second smaller anchor higher up to carry the eye toward the landing. Vary the sizes deliberately. A mix of 8×8, 11×14, and 16×20 frames reads as curated; nine identical squares reads as a spreadsheet. FSC-certified solid wood frames give you that weight difference and hold their corners better than thin composite ones over years of stair traffic vibration.
Step 3: Lock the Spacing With a Consistent Gap
Spacing is where gallery walls quietly succeed or fail. Pick one gap measurement and hold it everywhere. For most staircase walls, 2 to 3 inches between frames is the sweet spot. Tighter than 2 inches feels cramped in a narrow stairwell; wider than 3 inches breaks the group into islands that don’t relate to each other.
Use a spacer you can trust. A strip of cardboard cut to exactly 2.5 inches beats eyeballing it every time. Hold it between frames as you go and the whole grid stays honest. For heavier 16×20 wood frames, skip the single nail. Use two D-ring hooks and a picture-hanging strip rated for the frame’s weight, since a stairwell sees more wall vibration than a flat hallway. Owner reviews on the major home design subreddits repeatedly flag single-nail failures on stairs. That’s the number one cause of a frame drifting crooked within a month. Two anchor points fix it.
Step 4: Balance the Bottom and the Landing
The two ends of a staircase gallery do the most work, and they’re the spots people rush. At the bottom, let the smallest frames land near eye level for someone standing on the ground floor, roughly 57 to 60 inches from the floor to the center of the lowest frame. That ties the gallery to the room it opens into instead of floating away up the stairs.
At the top, don’t just stop. Let one or two frames spill onto the landing wall so the arrangement resolves instead of getting chopped off. A GREENGUARD-certified matte frame finish helps here because landings often catch harsh overhead light, and matte kills the glare that flat glossy frames throw back at you. Step back one final time from the ground floor. If your eye travels smoothly from the bottom frame to the landing without snagging on a gap, the arrangement’s done.
The Right Products Make It Easier
The hardest part of a staircase gallery is size variety and durable hanging, so I focused on frame sets that clear a 4.5 owner rating and offer either matched multiples or larger anchor pieces. Start with a 12×12 set if you want an instant nine-frame grid with mat flexibility. Reach for the 16×20 oak set when you need that two-thirds-up anchor from Step 2.

Pros
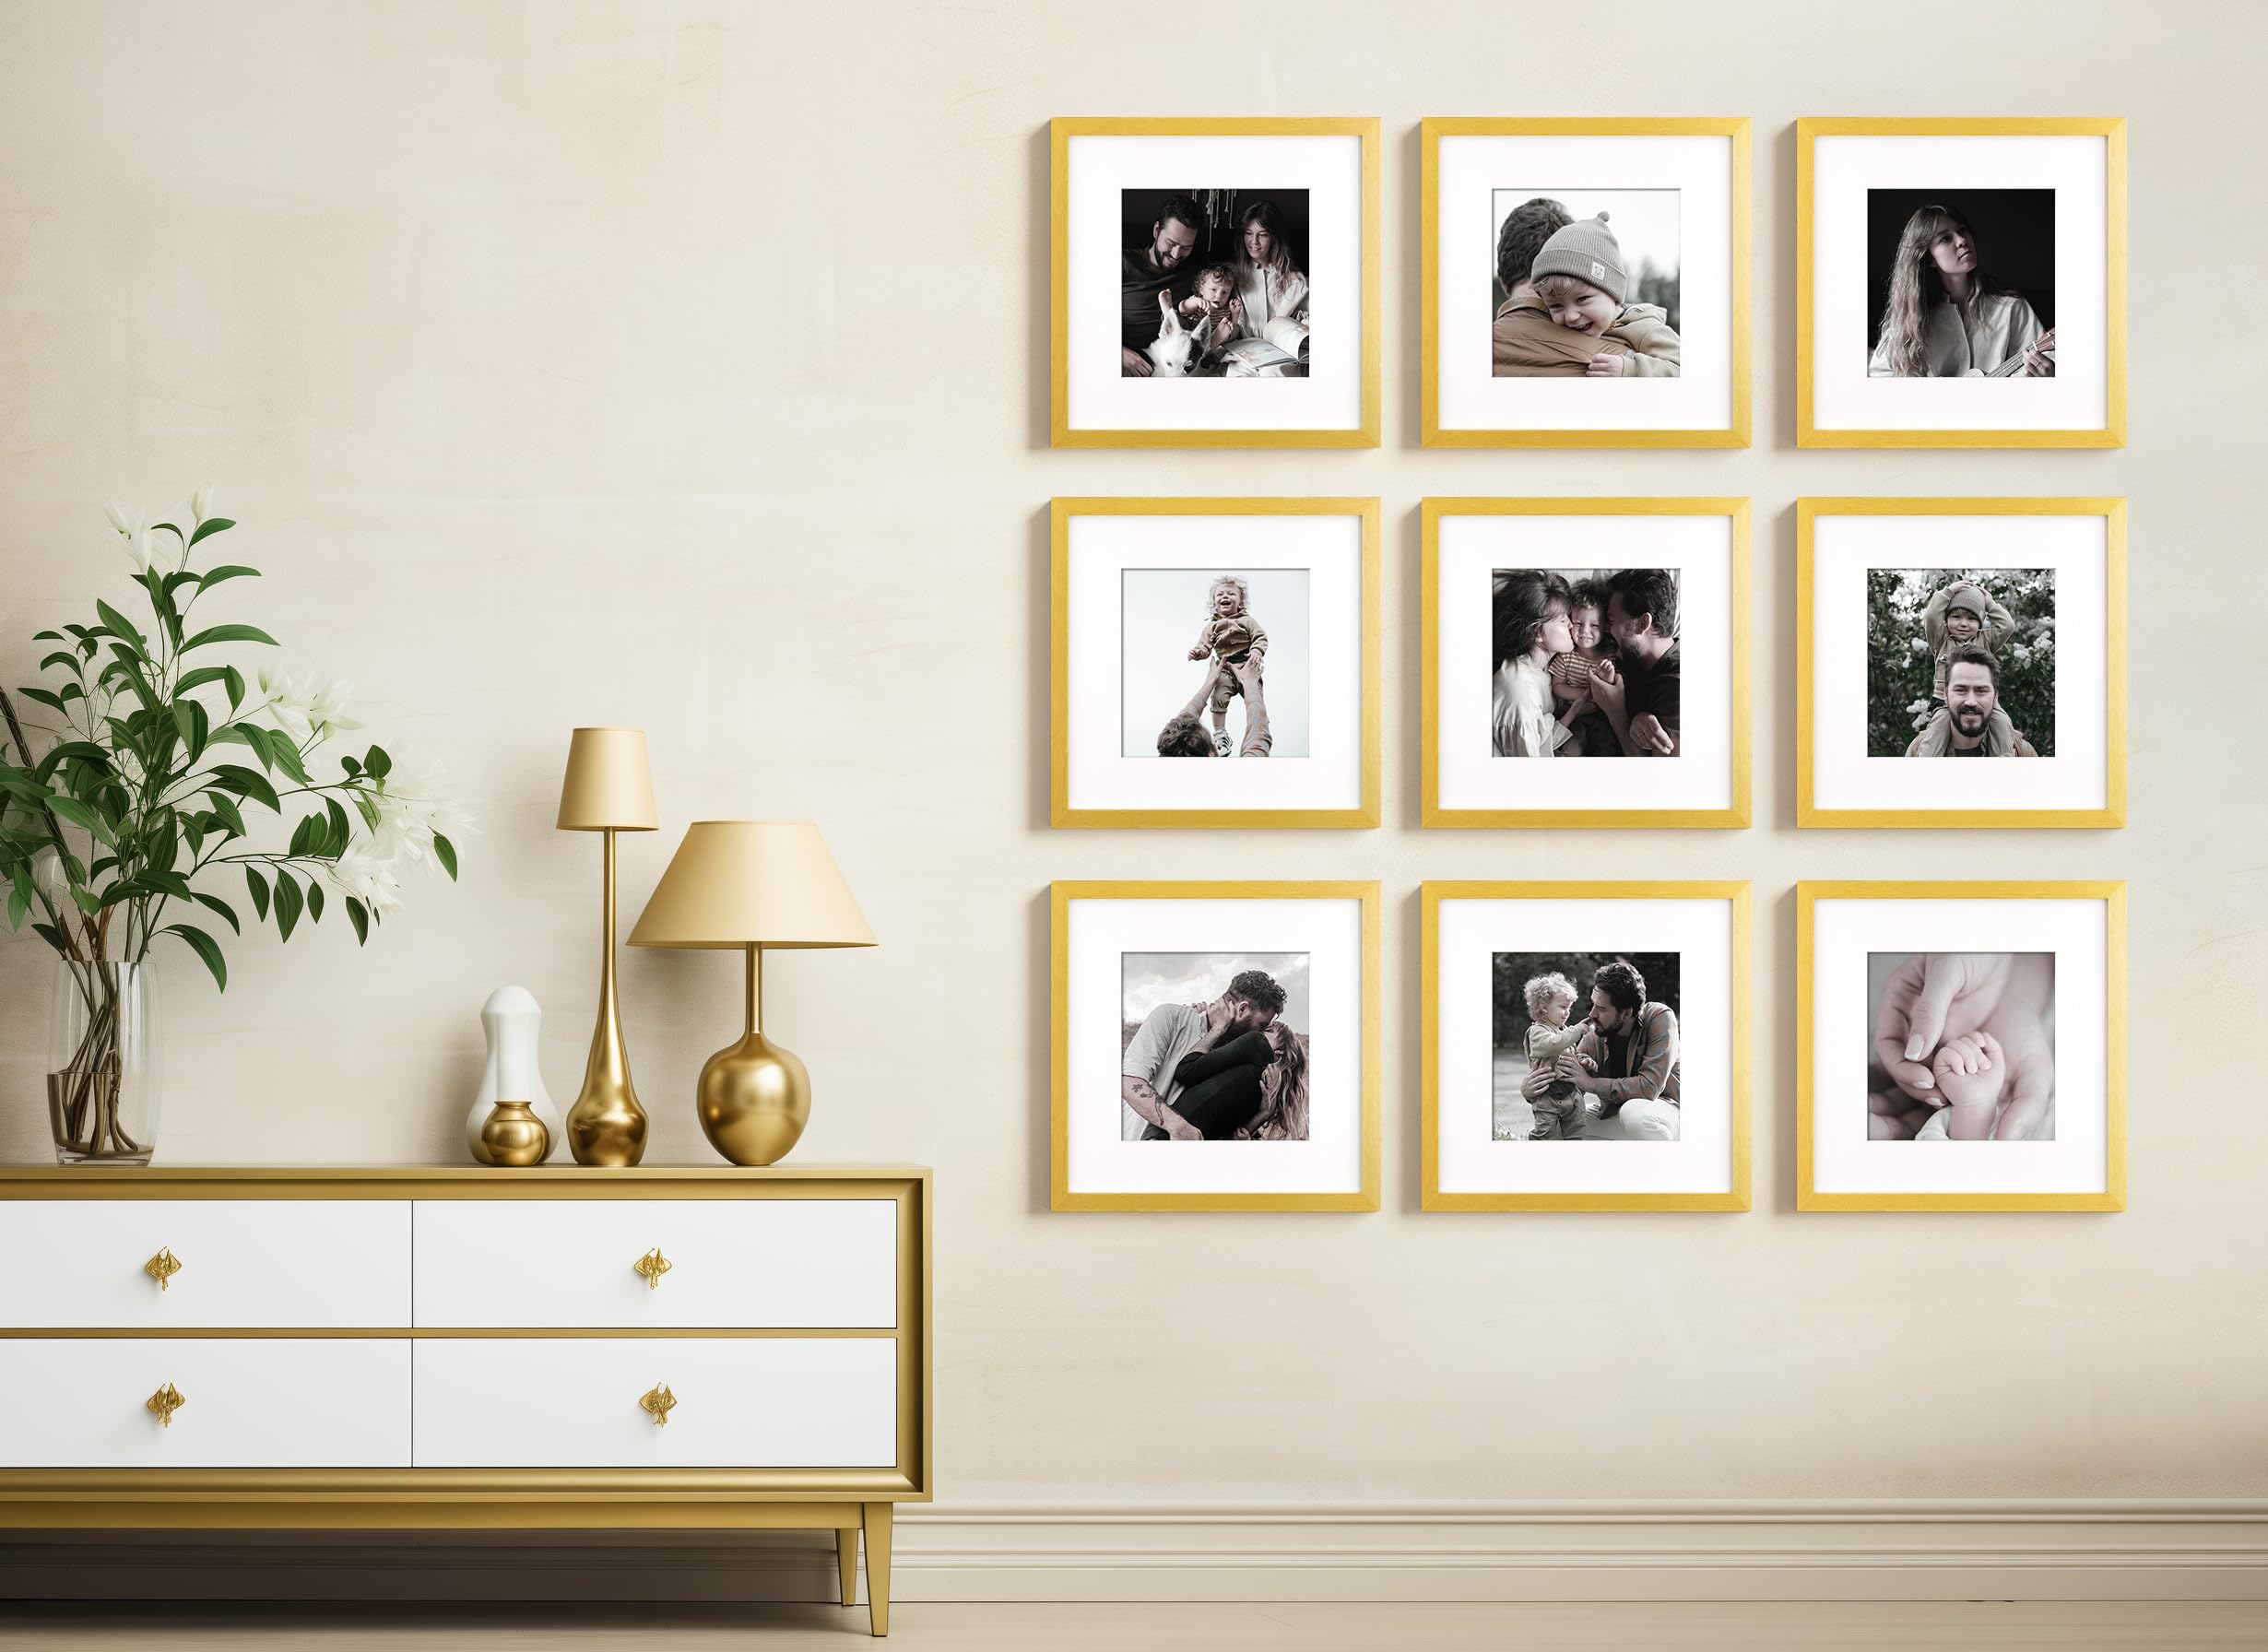
- Nine frames in one purchase at $44.99 works out to roughly $5 per frame, a strong value for a matching set with a premium gold finish.
- Flexible mat system supports both 8x8 and 12x12 display sizes, giving you real versatility without buying additional frames.
- Acrylic front is lighter and safer than glass, a practical advantage for renters or anyone hanging frames on drywall.
- Brushed satin-gold finish reads as contemporary rather than ornate, pairing easily with a wide range of existing decor.
- Arrives with all hanging hardware pre-installed, reducing setup time significantly for a nine-piece arrangement.
Cons
- The mat opening measures 7.5x7.5 inches, so the visible image area is slightly smaller than a true 8x8 print, which can surprise buyers expecting a full-bleed display.
- Engineered wood construction, while lightweight, may not have the same long-term durability or heft as solid wood or metal frames at a higher price point.
- Gold tone may read more yellow than champagne in certain lighting conditions, making it a potential mismatch for cooler, silver-toned interiors.
There is something genuinely satisfying about opening a box and finding nine frames that actually look like they belong together. The Yaetm set arrives with a consistent brushed-gold finish across all nine pieces, which is harder to pull off at this price than most shoppers expect. The warm, satin tone catches light without being flashy, making it an easy complement to neutral walls, warm wood furniture, and soft textiles.
What makes this set practical beyond the aesthetics is the dual-mat system. You can run all nine frames at the 8x8 format for a tight, uniform grid, or pull the mats on a few and mix in full 12x12 prints for a more editorial, layered look. That kind of flexibility is usually reserved for more expensive frame collections. The acrylic front keeps things lightweight and worry-free, especially useful when you are covering a large wall section and do not want nine glass frames resting on a single anchor point.
If you want a ready-to-hang gallery wall with real visual presence without spending an afternoon hunting for matching individual frames, this one delivers.
Styles it works with: Modern Glam, Contemporary Minimalist, Transitional, and Warm Scandinavian interiors where a gold accent feels intentional rather than excessive.
Best placed in: A living room feature wall above a sofa or console, a bedroom gallery arrangement over a headboard, or a hallway display running family photos in a clean grid layout.
May not suit: Spaces with a strictly cool or industrial palette where brushed gold reads as too warm; also worth reconsidering in homes with very young children where lightweight frames on lower walls could be a safety concern.
Buy it if:
- You are building a gallery wall from scratch and want a uniform, curated look without sourcing nine individual frames separately.
- You have a mix of 8x8 and 12x12 prints and need a frame set that can display both formats within a single cohesive arrangement.
- You are looking for a housewarming, birthday, or holiday gift that is functional, attractive, and ready to use out of the box.
Consider waiting if:
- You are mid-remodel and have not yet finalized your wall color or furniture finish, since locking in a gold frame before confirming the palette could lead to a mismatch.
Skip it if:
- Your existing decor is built around black, silver, or cool-toned metals, where a warm brushed gold will clash rather than complement.
- You need frames for pieces larger than 12x12 inches, as this set does not accommodate oversized prints without an upgrade.
Check the latest price and availability on Amazon before it sells out.

YESKAY 12x12 Picture Frame Set of 9 - Black Square Gallery Wall Frames with Mat for8x8 Photos, MDF Wood & HD Plexiglass
Pros
- Includes 9 coordinated frames for an instant gallery wall without mixing and matching
- HD plexiglass is lighter and safer than glass, especially in high-traffic areas
- Turnbutton back panel makes swapping photos quick and tool-free
- Available in 6 color options to match different decor styles
- Comes with protective packaging to reduce transit damage
Cons
- MDF construction is lighter-weight and less premium-feeling than solid wood frames
- No reviews yet to confirm long-term durability or color accuracy in person
- Mat opening is slightly smaller than 8x8, which may crop edges of tightly composed photos
Gallery walls can feel overwhelming to plan, but this set takes most of the guesswork out of it. You get nine identical square frames in a classic black finish that work together right out of the box. The uniform sizing creates a clean grid layout that looks intentional and polished without hiring a designer.
The HD plexiglass front is a practical touch that glass frames often lack. It keeps your photos protected without the weight or shatter risk, which matters when you're hanging nine frames one wall. The turn-button backs also make swapping out photos painless, so your gallery can evolve with new memories or seasonal art prints.
If you want a put-together gallery wall without spending hours sourcing individual frames or worying about mismatched finishes, this set delivers.
Styles it works with: Modern Minimalist, Scandinavian, Contemporary, Transitional
Best placed in: Living room accent wall, hallway or staircase gallery, home office above a desk
May not suit: Ornate or traditional decor schemes expecting carved wood detail, or very small rooms where nine12x12 frames would overwhelm the wall space
Buy it if:
- You want a ready-made gallery wall set without hunting for matching frames individually
- You have a large blank wall that needs a cohesive focal point
- You prefer lightweight, shatter-resistant plexiglass over traditional glass
Consider waiting if:
- You want to see verified buyer reviews and real-life photos before committing
- You need a color other than the six currently offered
Skip it if:
- You need premium solid wood frames for a formal dining room or luxury space
- You only need one or two frames and do not want leftover extras
Check the latest price and availability on Amazon before it sells out.

Pros
- Real solid oak wood gives a premium look and natural grain variation
- Plexiglass front is safer and lighter than glass, especially for high-traffic areas
- Includes mat board, hanging hardware, and sawtooth hangers in each frame
- Works both vertically and horizontally for flexible gallery arrangements
- 4-pack pricing brings the per-frame cost well below boutique alternatives
Cons
- Plexiglass can attract dust and fingerprints more than glass
- Mat opening is 10.5x13.5 inches, so a small border of 11x14 prints will be hidden
- No reviews yet available to confirm long-term durability or color accuracy in person
Gallery walls can look expensive and curated, but putting one together often means hunting for matching frames one at a time. This Yaetm oak set solves that problem right out of the box. Four identical solid wood frames with a consistent natural grain give your wall an intentional, collected look without the guesswork.
The oak finish has real warmth to it. It reads as natural and elevated rather than flat or plasticky, which is a common issue with budget frame sets. The plexiglass front keeps things lightweight and family-friendly, and the pre-attached sawtooth hangers mean you can go from unboxing to hanging in under 20 minutes.
If you want a cohesive gallery wall with real wood quality without paying designer prices per frame, this one delivers.
Styles it works with: Modern Farmhouse, Scandinavian, Coastal Casual, Transitional
Best placed in: Living room gallery wall, hallway or staircase arrangement, bedroom above the dreser, home office accent wall
May not suit: Very dark or mody interiors where a lighter oak tone may look washed out, or ultra-minimalist spaces where four 16x20 frames could feel visually heavy on a small wall
Buy it if:
- You are planning a gallery wall and want consistent, matching frames without buying individually
- You have kids or pets and need shatter-resistant fronts instead of glass
- You prefer real wood over MDF and want a natural oak tone that complements warm or neutral decor
Consider waiting if:
- You need a darker frame color like walnut or black to match existing pieces on your wall
- You want to see verified customer reviews before committing to a set
Skip it if:
- You need tabletop display capability since these are wall-mount only
- You require true optical-clarity glass for professional photography or fine art prints
Check the latest price and availability on Amazon before it sells out.
The Anchor Set for Step 2 (Yaetm 16×20 Oak Frame Set of 4)
This solves the anchor problem directly. The 16×20 size matted down to 11×14 gives you that larger focal frame the two-thirds-up spot needs, and the natural solid oak reads heavier than composite without the weight penalty. Four frames let you place one main anchor plus a smaller echo higher on the run. At a 4.5 rating, owners consistently note the wood corners hold square, which matters on a vibrating stair wall. If you only buy one set to build around, this is it. The FSC-style solid oak also takes touch-up better than veneer if a corner ever knocks the rail.
The Grid Builder (Yaetm Gold 12×12 Set of 9)
Nine frames in one box is the fastest way to fill a tall stairwell. The 12×12 size displays 8×8 with the mat or a full 12×12 without, so you can vary photo scale within a single uniform frame footprint. That flexibility is what keeps a nine-frame set from looking like a spreadsheet. The gold finish carries warmth up a dim stairwell, and at a 4.6 rating it’s the highest-rated pick here. Use these as the connective tissue between your larger anchors. Mix mat and no-mat frames to build the size rhythm Step 2 calls for.
The Budget Multiple (YESKAY 12×12 Set of 9)
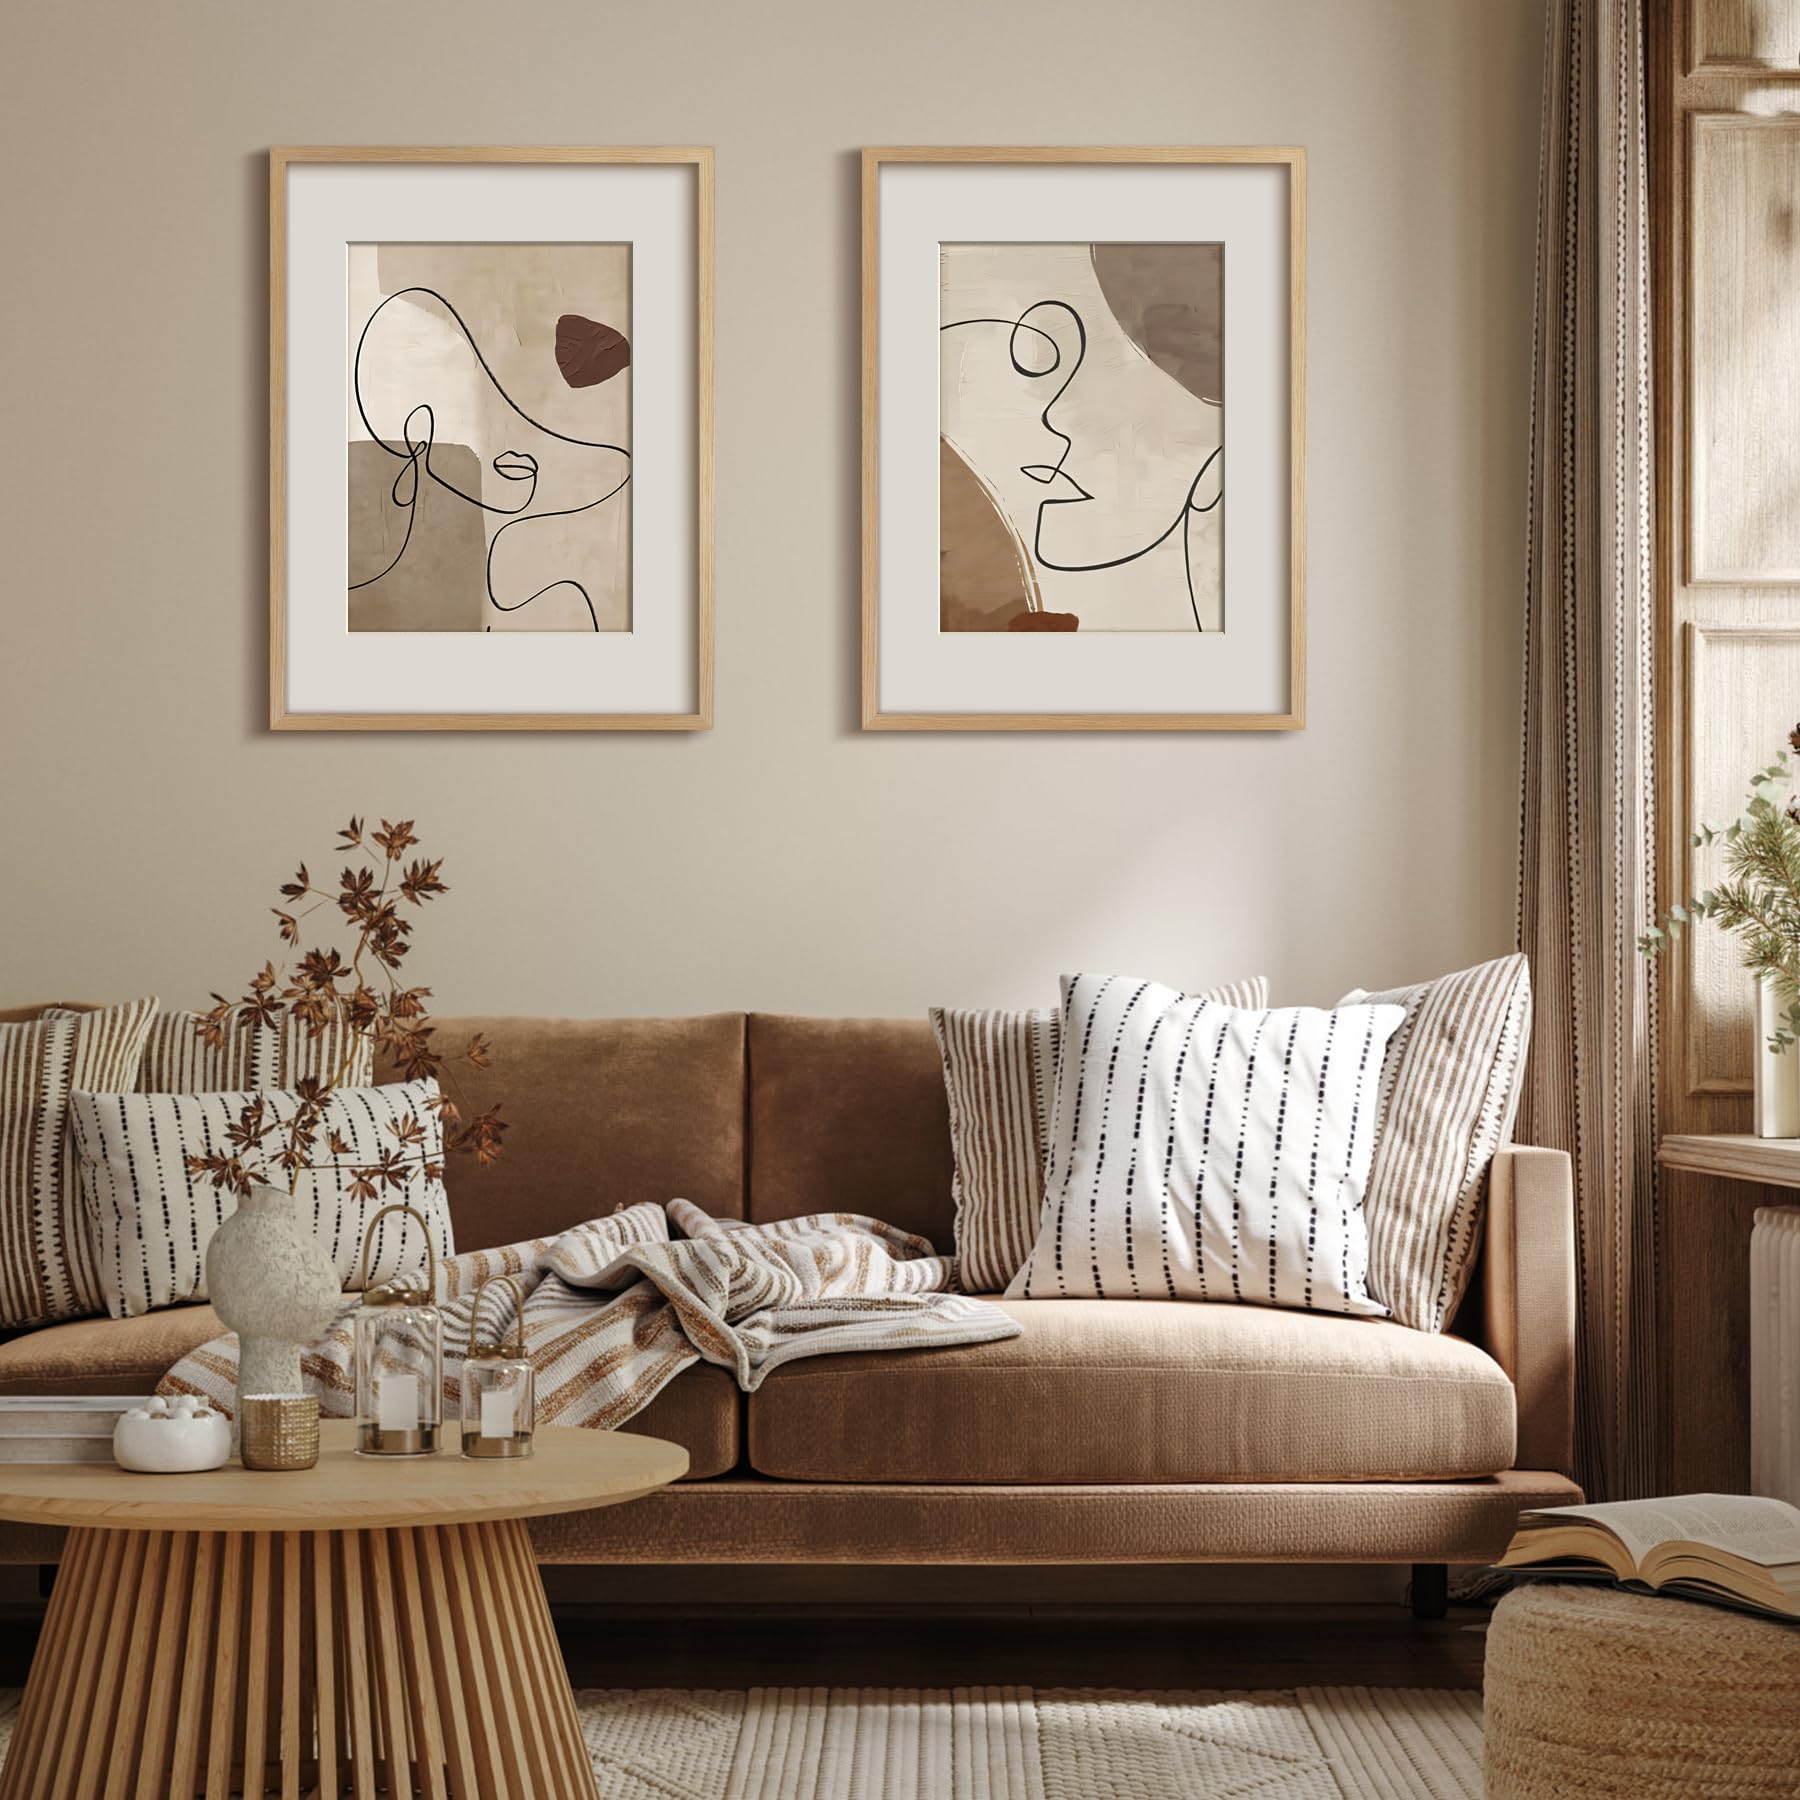
Same nine-frame convenience, slightly lower price point, still a solid 4.5 rating. The YESKAY set displays 8×8 with a mat or 12×12 without, so it matches the Yaetm grid’s flexibility if you’d rather not spend up. It’s the pick for a longer staircase where you need a lot of frames and the cost of two premium sets adds up fast. Corners are a touch lighter than the oak anchor set, so I’d keep these to the mid and upper run rather than the high-traffic bottom step. Good value for filling volume.
Frequently Asked Questions
What if my staircase is narrow and feels cramped?
It depends on your wall width, but narrow stairwells actually favor smaller frames climbing tight. Keep to 8×8 and 11×14 sizes, hold the gap at 2 inches, and skip the oversized anchor. A single vertical column of frames following the diagonal reads clean and doesn’t crowd a stairwell under 36 inches wide.
What if my walls are textured or plaster, not drywall?
Almost never a dealbreaker. Plaster and textured walls just need the right hardware. Use self-drilling drywall anchors or a masonry bit for plaster, and always go with two D-ring hooks per frame on these surfaces. Check one anchor’s hold before committing the whole gallery.
What if my ceiling is really tall over the stairs?
Yes, tall stairwells are the best-case scenario for this. Let the gallery climb the full height and add a second anchor frame higher up so the eye keeps traveling. Just keep the top frame reachable from the stairs for dusting, roughly no higher than 84 inches above the nearest tread.
What if I want to add frames later without redoing it?
It depends on your baseline. If you kept the painter’s tape diagonal and a consistent 2.5-inch gap from Step 3, extending is easy. Just continue the same diagonal and spacing upward or onto the landing. Save your paper templates so future frames match the existing rhythm exactly.
What if my stairs get a lot of sunlight during the day?
Yes, and that changes your finish choice more than your layout. Direct sun fades photos and yellows cheap frame glass. Choose matte GREENGUARD-certified frames to cut glare, and use UV-protective glass or acrylic if the wall gets more than a few hours of direct light daily.
Bottom Line
Tape the diagonal first and every other decision gets simpler. Anchor with your largest frame about two-thirds up, hold a consistent 2 to 3 inch gap, and resolve both ends so the gallery doesn’t float or get chopped off at the landing. The Yaetm 16×20 oak set is the anchor most staircases need; a nine-frame 12×12 set fills the run around it. Skip the single nail on stairs. Two hooks per frame, always.



Write Your Review
No reviews yet. Be the first to share your experience!