

> Editorial Note: I’m Hannah Lin, an Interior Living Researcher who’s spent 9+ years analyzing the home furniture market. This guide draws on BIFMA, GREENGUARD, and FSC certifications, plus owner reviews aggregated from Wirecutter, Apartment Therapy, and the major home design subreddits.
The mistake almost everyone makes is running a damp cloth over the outside and calling it done, while months of crumbs quietly char inside the slots. That buildup is what makes a toaster smell like smoke and burn your bread unevenly. Cleaning it out takes about 10 minutes, no special products, and the same countertop instincts you’d use styling a shelf near your best gallery wall frames, best console table for entryway, best large floor mirror, best wall mirror for living room, or best table lamp for living room.
How Do You Empty the Crumb Tray the Right Way?
Start here, because the crumb tray does 80% of the work. It’s the metal or plastic drawer at the base of most toasters. Unplug the unit first. Every single time. A toaster draws around 800 to 1,500 watts, and you’re about to put your hands near the heating elements.
Slide the tray out over a trash can or the sink. If it hasn’t been emptied in a while, expect a small avalanche. Tap it against the bin, then wash the tray in warm, soapy water. Dry it completely before it goes back in, because trapped moisture near a heating element is how you get that acrid smell on the next slice.
Toasters without a removable tray are more common in compact 2-slice models. For those, turn the whole unit upside down over the sink and shake gently. Don’t bang it hard against the counter. The internal wiring and the nichrome heating wires are delicate, and a hard knock can loosen a connection.
Do this once a week if you toast daily. Owner reviews aggregated on Wirecutter consistently flag skipped crumb-tray cleaning as the top reason a toaster gets tossed early. It’s not the machine failing. It’s carbon buildup nobody cleared.
How Do You Clean the Inside Slots Without Breaking Anything?
Never stick a knife or fork in there. Metal utensils bend the heating elements and can strip the thin nichrome coating, which shortens the toaster’s life and creates hot spots that scorch one side of your bread.
Use a soft, dry pastry brush or a clean, dry toothbrush instead. With the toaster unplugged and turned upside down over the sink, brush down each slot from the top to dislodge stuck crumbs. Work gently along the wire elements, not across them. A can of compressed air, held 6 inches back in short bursts, clears the fine debris a brush leaves behind.
For sticky residue from a buttered bagel or a slice of cinnamon toast, dampen a cotton swab with a little white vinegar. Wring it nearly dry, then wipe the visible interior walls. Vinegar cuts grease without leaving a film. Skip water-heavy methods entirely.
Let the interior air-dry for 30 minutes before plugging back in. The heating elements should never be wet when powered.
Here’s the honest truth. You won’t get every crumb, and you don’t need to. The goal is clearing the loose carbon that smokes and the grease that goes rancid. Perfect is the enemy of done here.
How Do You Clean the Exterior and Handle Stainless Steel?
The outside is where a toaster earns its spot on the counter, so this is half aesthetics, half maintenance. Wipe the body with a soft microfiber cloth dampened with warm, soapy water. Wring it out well. You want damp, not dripping, so no liquid seeps into the seams.
Stainless steel toasters show fingerprints and water spots fast. Wipe with the grain of the brushed metal, never against it, the same rule that keeps a stainless fridge looking clean. A drop of white vinegar on the cloth removes water spots, and a tiny bit of olive oil buffed in afterward restores the low sheen. Apartment Therapy’s kitchen-care guides recommend this two-step approach over spray polishes, which build up residue over time.
For plastic or painted bodies, skip abrasive pads. A magic-eraser sponge lifts scuffs but can dull glossy finishes if you scrub hard, so try a back corner first. Chrome and colored enamel models just need the damp-cloth pass.
Don’t forget the lever and control dial. Grease collects in those grooves. A dry toothbrush gets into the seams a cloth can’t reach. Buff everything dry with a second clean cloth so no streaks set.
How Often Should You Deep-Clean, and What Protects the Counter?
Light weekly cleaning plus a monthly deep clean keeps almost any toaster running for years. The weekly job is the crumb tray and a quick exterior wipe. The monthly deep clean adds the interior slot brushing, the compressed-air pass, and a vinegar wipe of the tray drawer channel.
Where a lot of people go wrong is the counter underneath. Crumbs escape even the best tray, and a toaster’s feet can leave heat marks or scratches on a wood or laminate surface over time. A dedicated crumb catcher tray sits under the unit, collects the fallout, and slides out for a rinse. It’s the single easiest upgrade for keeping the whole toasting zone tidy.
Materials matter for these mats. Food-grade silicone rated heat-resistant to around 450°F won’t warp under a warm toaster, and it wipes clean in seconds. Wood trays look warmer against a styled counter but need occasional oiling to resist moisture, similar to how you’d treat an FSC-certified cutting board.
Set a reminder if you have to. A clean toaster toasts evenly, lasts longer, and doesn’t announce itself with a burnt smell every morning.
Helpful Picks
I looked for crumb catchers and counter protectors that clear a 4.0-plus owner rating, use food-safe materials, and fit a standard 2-slice footprint. Start with the silicone mat if you want fast cleanup; go wooden if the look matters more on a styled counter.


Ayiaren Acacia Wood Mini Charcuterie Board10x5.5" Small Rectangular Serving Tray Cheese Appetizer Platter
Pros
- Genuinely food-safe acia wood with no chemical finishes or adhesives
- Compact size is versatile enough for food service and non-food home decor use
- Raised edges with a slightly deeper bowl prevent food and small items from sliding off
- Smooth, well-finished surface with no sharp edges or rough spots noted by reviewers
- Strong value at the price point with consistently positive feedback across nearly 1,000 reviews
Cons
- At 10x5.5 inches it is too small for hosting groups, requiring multiple boards for a full charcuterie spread
- Acacia wood requires hand washing and occasionaliling to prevent drying or warping over time
- No built-in handle or hanging hardware, limiting wall-display or carry options
There is something genuinely refreshing about a product this simple that just works. The Ayiaren mini acacia board has the kind of warm, honeyed wood grain that makes a $10 appetizer spread look intentional and styled. It does not feel like a bargain item when it is sitting on your counter loaded with cheese and fruit.
What sets it apart from similar boards at this price is the attention to finish quality. The surface is smooth, the edges are rounded, and the slightly raised border means your food actually stays put. It reads as a considered home object rather than a throwaway kitchen tool, which is why it transitions so naturally into bathroom and vanity styling too.
If you want that lived-in, natural wood look on your table or shelf without paying boutique prices, this one delivers.
Styles it works with: Modern Farmhouse, Scandinavian, Boho, Minimalist
Best placed in: Kitchen counter or dining table for entertaining, bathroom vanity or toilet tank as a decorative organizer, coffee table as a styled catch-all tray for candles or small objects
May not suit: Highly formal or traditional interiors where polished ceramic or marble is the dominant material, and very small bathrooms where even a compact10-inch tray would feel crowded
Buy it if:
- You want an affordable natural wood tray for one or two-person snack boards, appetizers, or dessert plating
- You are styling a bathroom vanity, nightstand, or shelf and need a small organic-looking tray to coral small items
- You are buying multiples to create a cohesive farmhouse or boho table display without a big budget
Consider waiting if:
- You need a larger board for group entertaining, as the 10x5.5-inch size will feel limiting for more than two people
Skip it if:
- You need a board with a handle or juice groove for cutting and serving larger cuts of meat or cheese
- You want something dishwasher-safe, as acia wood requires hand washing to maintain its finish
Check the latest price and availability on Amazon before it sells out.
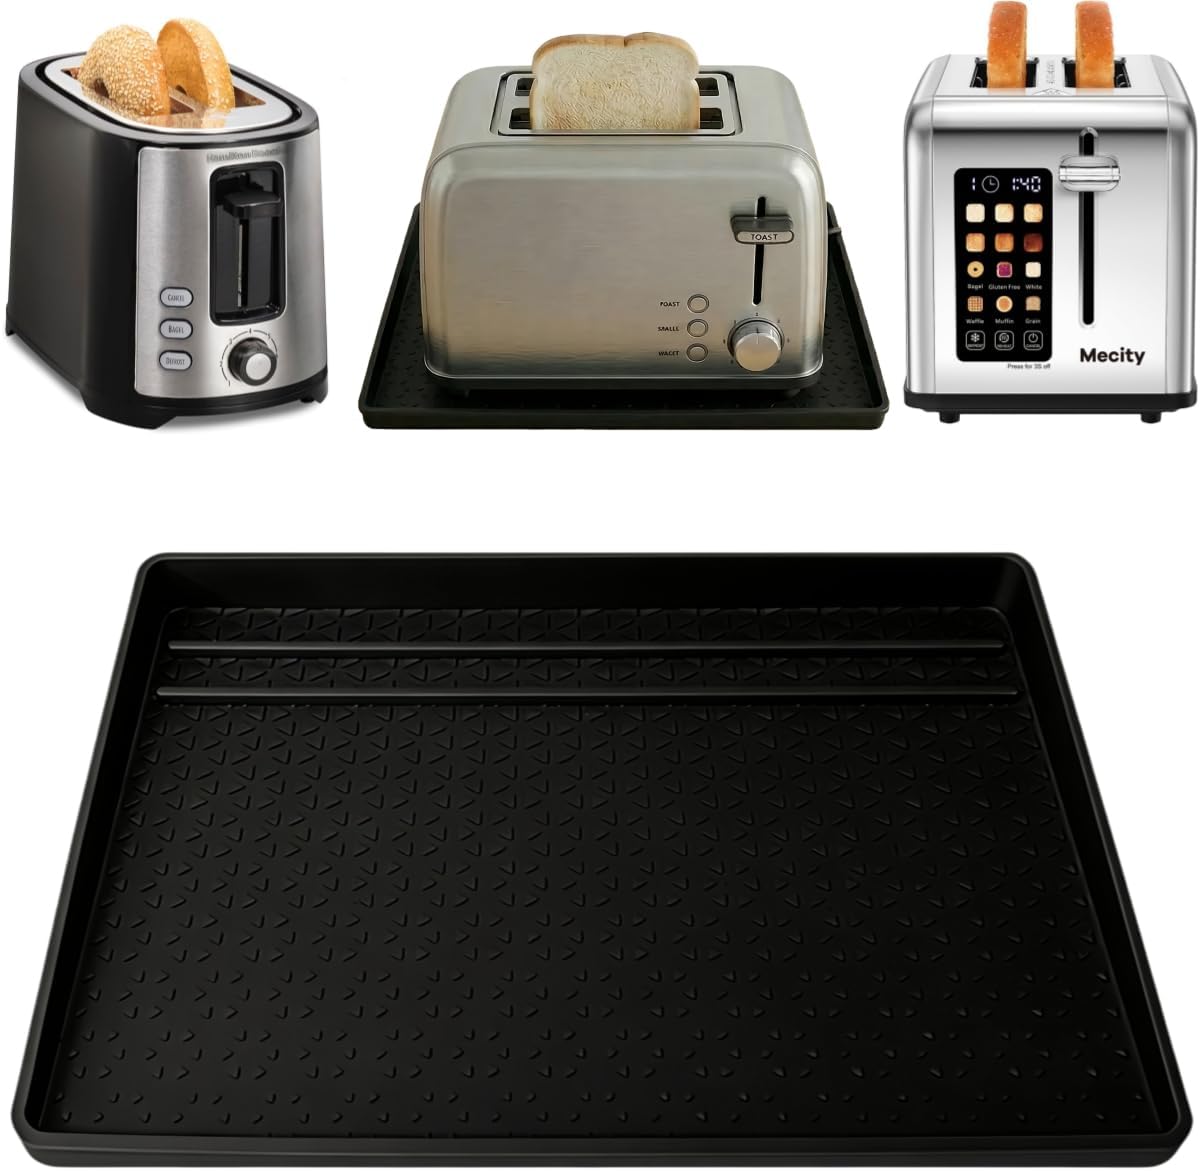
Pros
- Made from food-grade silicone that handles high heat safely
- Raised edges and non-slip bottom work together to contain messes effectively
- Fits standard 2-slice toasters without hanging over counter edges
- Extremely easy to clean by shaking, rinsing, or tossing in the dishwasher
- Affordable price point for a durable kitchen accessory
Cons
- Only fits 2-slice toasters; too small for 4-slice models
- Limited to one color option (black), which may not match every kitchen
- Only 19 reviews so far, making long-term durability hard to confirm
This is one of those small kitchen upgrades that makes you wonder why you did not get one sooner. The HiloFenar crumb catcher sits quietly under your toaster, catching every stray crumb and bread bit that would otherwise end up scattered across your countertop. It is simple concept executed well, with food-grade silicone that can handle the heat your toaster puts out.
What sets it apart from basic placemat or paper towel hack is the raised-edge design combined with a non-slip bottom. Crumbs stay contained, and the tray stays put. It looks clean, blends into most kitchen setups, and you can toss it in the dishwasher when it needs a refresh. No fuss, no daily wiping ritual.
If you want a cleaner countertop without adding another chore to your morning routine, this one delivers.
Styles it works with: Modern Minimalist, Scandinavian, Industrial, Contemporary Kitchen
Best placed in: Kitchen countertop under toaster, breakfast bar appliance station, pantry shelf under small appliances
May not suit: Kitchens with 4-slice or extra-wide toasters that exceed 8x12 inches, or countertop setups where you prefer a full-length appliance mat covering multiple devices
Buy it if:
- You own a standard 2-slice toaster and are tired of crumbs collecting on your counter every morning
- You want a heat-resistant layer between your toaster and a delicate countertop surface like marble or butcher block
- You prefer a low-maintenance solution you can rinse or dishwasher-clean in seconds
Consider waiting if:
- You want a color other than black to match a lighter kitchen palette
Skip it if:
- You have a 4-slice toaster or toaster oven that needs more than 8x12 inches of coverage
- You need a full countertop protector mat rather than a single-appliance tray
Check the latest price and availability on Amazon before it sells out.

Xylarnoveth Wooden Crumb Catcher Tray for Under 2-Slice Toaster - Countertop Protector & Breakfast Station Organizer
Pros
- Solid wood construction with a sealed, wipe-clean surface that holds up to daily use
- Raised edges effectively contain crumbs and small spills without adding bulk
- Slim enough to fit under standard wall cabinets in compact kitchen layouts
- Multi-use design works beyond the toaster as a coffee tray or countertop organizer
- Flat, even base keeps the toaster stable and level
Cons
- Only fits 2-slice toasters, so4-slice or wide-slot models will overhang
- Very few customer reviews available, making long-term durability hard to confirm
- Dark finish may show water spots or light-colored crumbs more visibly than lighter wood
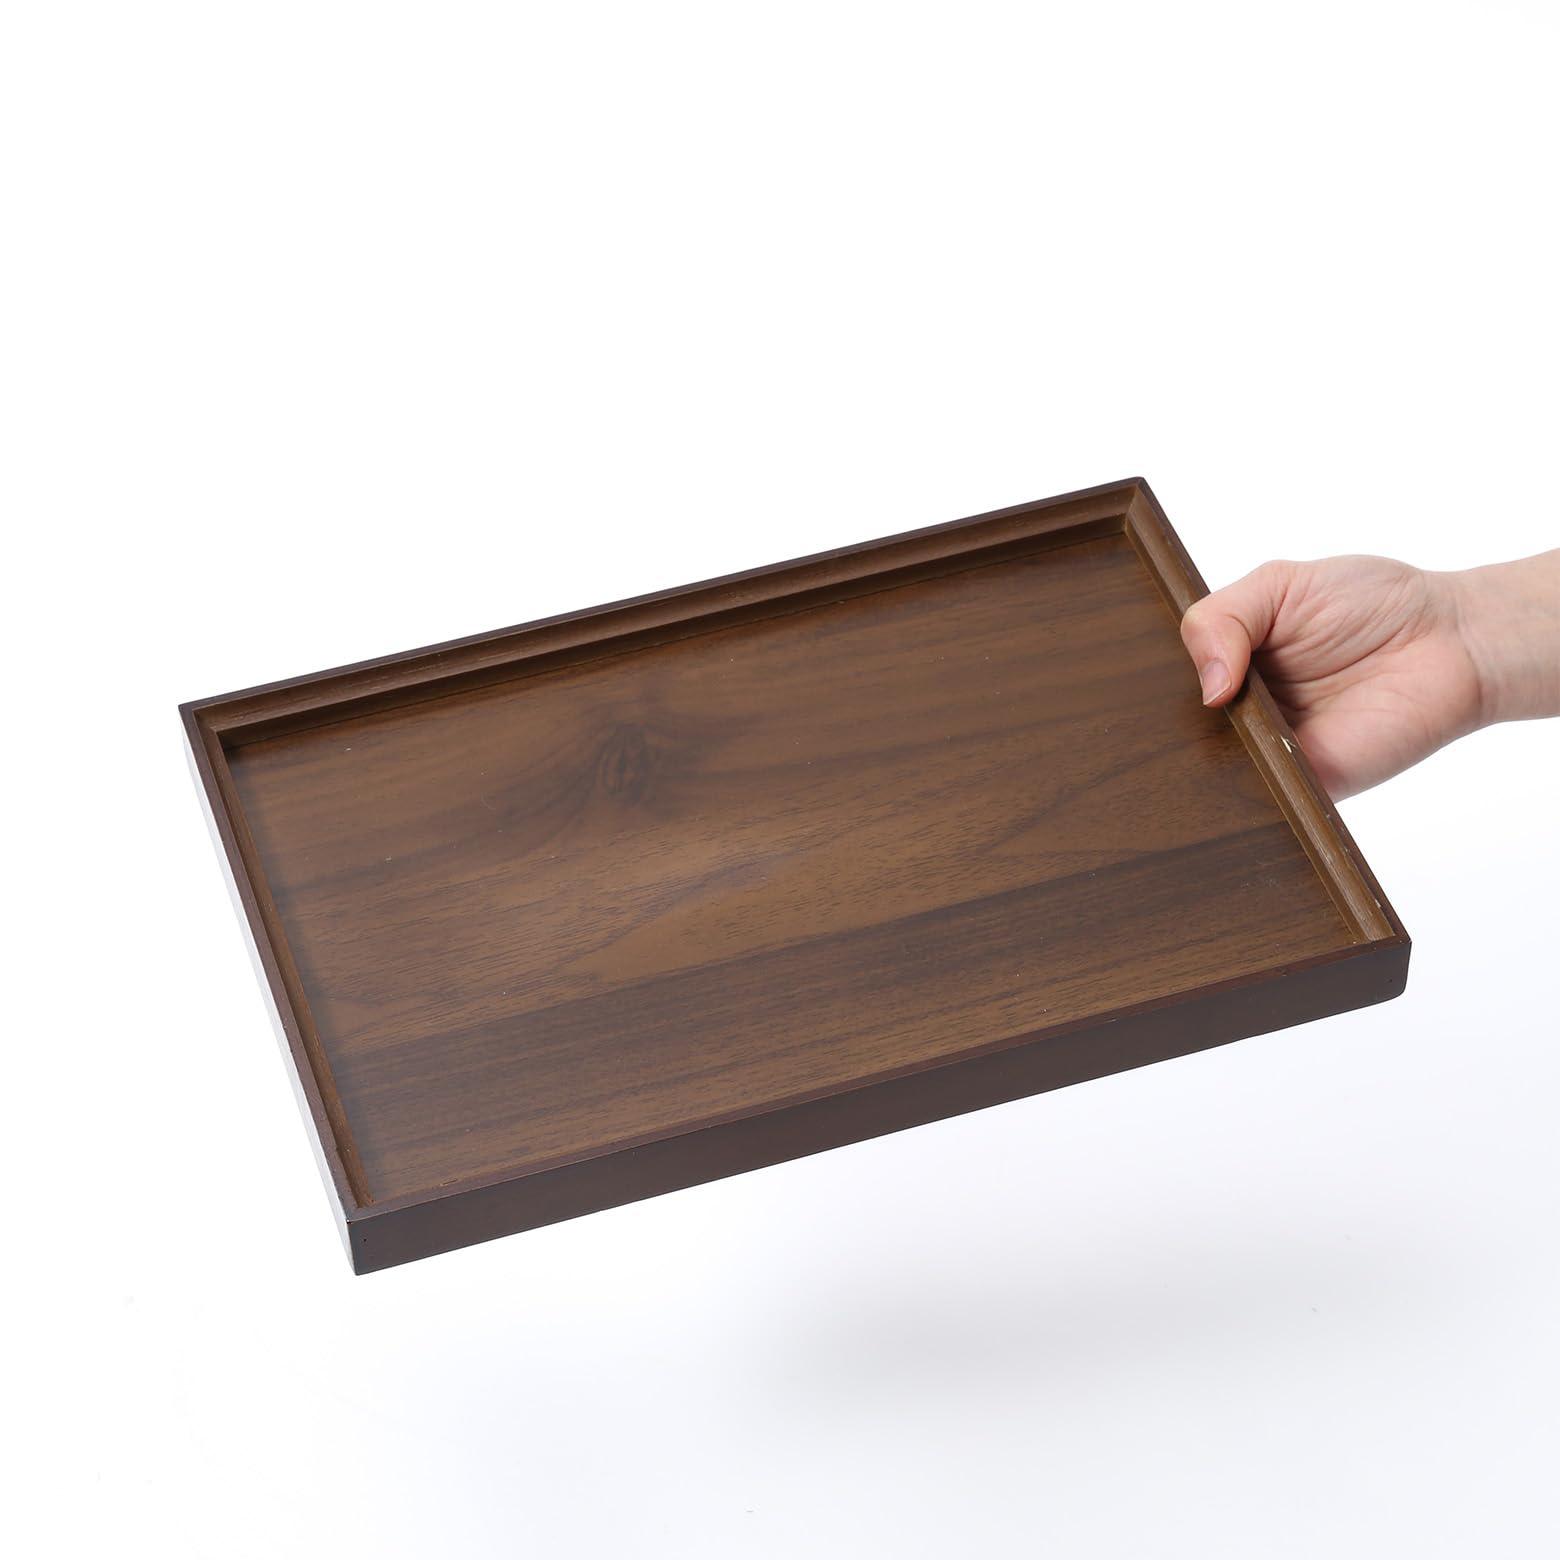
This is one of those small kitchen additions that quietly makes your mornings better. The Xylarnoveth crumb catcher sits under your toaster and does exactly what you would hope: it catches the mess so your countertop stays clean. The dark wood finish gives it a furniture-quality look that blends right into your kitchen rather than screaming "utility tray."
What sets it apart from generic tray is the intentional sizing for 2-slice toasters and the low-profile raised edges that keep crumbs contained without making the setup look bulky. There is enough extra space around the toaster for a small jam jar or sugar bowl, which turns a plain appliance spot into a tidy little breakfast nook.
If you want a cleaner countertop every morning without adding clutter or spending more than a few minutes on upkeep, this one delivers.
Styles it works with: Modern Farmhouse, Minimalist, Scandinavian, Transitional
Best placed in: Kitchen counter beside the backsplash, apartment galey kitchen under wall cabinets, breakfast bar or coffee station corner
May not suit: Kitchens with very light or white countertops where the darkray creates high contrast you may not want, or households using oversized 4-slice toasters that exceed the tray dimensions
Buy it if:
- You are tired of wiping crumbs off your counter every single morning
- You live in an apartment or small kitchen with limited counter space under wall cabinets
- You want your toaster area to look intentional and organized rather than mesy
Consider waiting if:
- You want to see more long-term customer reviews before committing, since this product is still relatively new
Skip it if:
- You own a 4-slice or extra-wide toaster that will not fit within the tray dimensions
- You prefer a lighter wood tone or color-matched tray to go with white or light cabinetry
Check the latest price and availability on Amazon before it sells out.
Frequently Asked Questions
Can I put the crumb tray in the dishwasher?
It depends on the material. Most stainless steel and enamel trays handle a top-rack cycle fine, but check your manual first. Plastic trays can warp under high heat, so hand-washing in warm soapy water is the safer call. Dry the tray fully before returning it.
Can I use water to clean inside the toaster?
No. Water near the heating elements and internal wiring is a shock and short-circuit risk, even when unplugged, because moisture lingers. Use a dry brush and compressed air for the slots, and a nearly-dry vinegar swab only on visible interior walls.
Is white vinegar safe on a stainless steel toaster?
Yes. Diluted white vinegar removes water spots and fingerprints without scratching, as long as you wipe with the grain of the brushed metal. Follow with a dry cloth. Skip bleach and abrasive powders, which can pit the surface.
How often should I clean my toaster?
It depends on use. Daily toasters need the crumb tray emptied weekly and a full deep clean monthly. If you toast a few times a week, every two to three weeks is enough. Sticky foods like buttered bagels push that schedule up.
Why does my toaster smell like it’s burning?
Almost always it’s accumulated crumbs charring on the heating elements. Empty the crumb tray and brush the slots, then run one empty cycle in a ventilated room. If the smell persists after a thorough clean, the wiring may be failing and the unit needs replacing.
Do I really need a crumb catcher tray under my toaster?
No, it’s optional, but it saves real cleanup time and protects the counter from scratches and heat marks. A silicone or wood tray under the toaster collects stray crumbs and slides out for a quick rinse. It’s a small upgrade that keeps the whole area tidy.
Can I clean the heating elements directly?
It depends on how. Never touch them with metal utensils or a wet cloth, which damages the coating. A gentle pass with a dry, soft brush is fine to knock off loose crumbs. Beyond that, leave the elements alone and focus on the tray and slots.






Write Your Review
No reviews yet. Be the first to share your experience!