

> Editorial Note: I’m Lauren Ro, and I write furniture buying guides. The picks here are judged on the specs that predict how a piece ages — frame joinery, foam density, and load ratings — checked against BIFMA and FSC certifications plus aggregated owner reports.
The reason a bathroom mirror cracks during removal is almost never the mirror. It’s the person yanking on a corner before figuring out whether it’s held by clips or glued flat to the wall. Those two mounts come off completely differently. Before you start, related guides help: bathroom mirror ideas, what size mirror for bathroom vanity, how to keep a bathroom mirror from fogging, bathroom vanities, bathroom cabinets, and bathroom organizer.
Figure Out How It’s Mounted
Look at the edges first, because the mount decides your entire method. If you see metal or plastic clips gripping the top and bottom edges, it’s a clip-mounted mirror, and those lift out in minutes. If the edges are bare glass sitting flush against the wall, it’s glued with mastic adhesive, and that’s the slow job.
A framed mirror is the third case and the easiest. It usually hangs on a French cleat or D-rings like a picture, so you lift it straight up and off. Check behind the top edge for a wire or bracket before assuming it’s glued.
Tap the surface gently and listen. A hollow sound near the edges suggests clips with a gap behind the glass, while a solid, dead sound across the whole face points to full adhesive contact. That two-minute check saves a shattered mirror.

Remove a Clip-Mounted Mirror
Take a clip-mounted mirror out by freeing the top clips first, since the bottom clips carry the weight. Have a helper hold the glass, because a standard 24×36 mirror is heavier and more awkward than it looks. Wear cut-resistant gloves and safety glasses before you touch a bare edge.
Loosen or slide the top retaining clips with a screwdriver or a plastic pry tool. Some clips unscrew, others are spring-loaded and slide up. Once the top is free, tilt the mirror’s top edge toward you a few degrees and lift it up and out of the bottom clips. Keep the glass vertical so it doesn’t flex.
Set the mirror down on a towel-padded floor, leaning it against a wall at a slight angle so it can’t slide flat and crack. Tape a large X of painter’s tape across the face first if you’re moving it far. That tape holds the glass together if it does break in transit.
Pry Off a Glued Mirror Safely
Free a glued mirror by cutting the adhesive behind it, not by pulling, because mastic holds hard enough to tear drywall off with the glass. Start at a top corner and work a long, flat pry tool or a wire behind the mirror, sliding it side to side to break the adhesive bond in sections. Protect the wall with a thin metal putty knife behind the pry point.
Feed wood shims into each freed gap as you go, so the mirror can’t suck back against the wall. A braided-wire method, running a wire like a saw behind the glass, works on stubborn mastic where a pry blade won’t fit. Go slowly. Adhesive that’s decades old is brittle and can let go all at once.
Expect wall damage under a glued mirror. The mastic usually pulls off paint and a skim of drywall paper, so plan to patch and repaint that section afterward. A framed replacement hides a rough patch better than another frameless sheet.
What You’ll Need
These are pry and trim-removal tools chosen for prying strength and owner rating, since freeing clips and cutting adhesive is the whole job. Match the tool to your mount: a thin pry blade for clips, a longer one for glued mastic. Start with a stiff automotive pry tool for the most control.

WHLLING 4140 Steel Pry Bar - 6.65" Automotive Panel Removal Tool with Chrome Finish for Car Interior & Trim
Pros
- Strong 4140 steel construction outlasts plastic alternatives
- Chrome finish prevents rust and provides non-slip grip
- Compact size makes it easy to store and maneuver in tight spaces
- Versatile for both interior and exterior automotive work
- Affordable price point for a metal tool
Cons
- No customer reviews yet to verify real-world performance
- Single-pack only, may need multiple tools for larger jobs
- Metal construction adds weight compared to plastic options
This pry bar hits the sweet spot between durability and safety. The 4140 steel construction means it won't snap in half like cheap plastic tools when you're pulling stubborn trim pieces, but the chrome finish keeps it smooth enough that you're not gouging your dashboard in the process.
What makes this tool practical for home mechanics is its size. At 6.65 inches, it's long enough to give you leverage but compact enough to work in the cramped spaces around car doors and consoles. The curved tip design is thin enough to slide behind panels without forcing, which is exactly what you need when you're trying not to break those fragile plastic clips.
If you want a reliable pry bar for occasional DIY car work without spending on a full professional kit, this one delivers.
Styles it works with: This is an automotive tool, not a home decor item. Best suited for garage workshops, tool storage areas, or vehicle maintenance spaces.
Best placed in: Garage toolbox, car trunk emergency kit, or workshop pegboard for easy access during automotive projects.
May not suit: This is a specialized automotive tool and not designed for home decor purposes. It belongs in a workshop or garage setting rather than living spaces.
Buy it if:
- You're tackling DIY car audio installation or dash removal
- You've broken plastic pry tools before and need something more durable
- You do occasional automotive trim work and want a reliable go-to tool
Consider waiting if:
- You need a full set of pry tools in different sizes for a major project
Skip it if:
- You're looking for home furniture or decor items (this is an automotive tool)
- You need non-marring plastic tools for delicate interior surfaces
Check the latest price and availability on Amazon before it sells out.

Pros
- Wider contact area prevents wall dents and trim splintering
- Spring-assisted design speeds up removal compared to standard pry bars
- Durable carbon steel construction withstands heavy hammer use
- Comfortable grip reduces hand fatigue during long projects
- Versatile for trim, cabinets, countertops, and flooring work
Cons
- No verified customer reviews yet to confirm real-world performance
- At $16.95, costs more than basic pry bars without spring mechanism
- 3-inch size may be too small for removing very long or thick baseboards
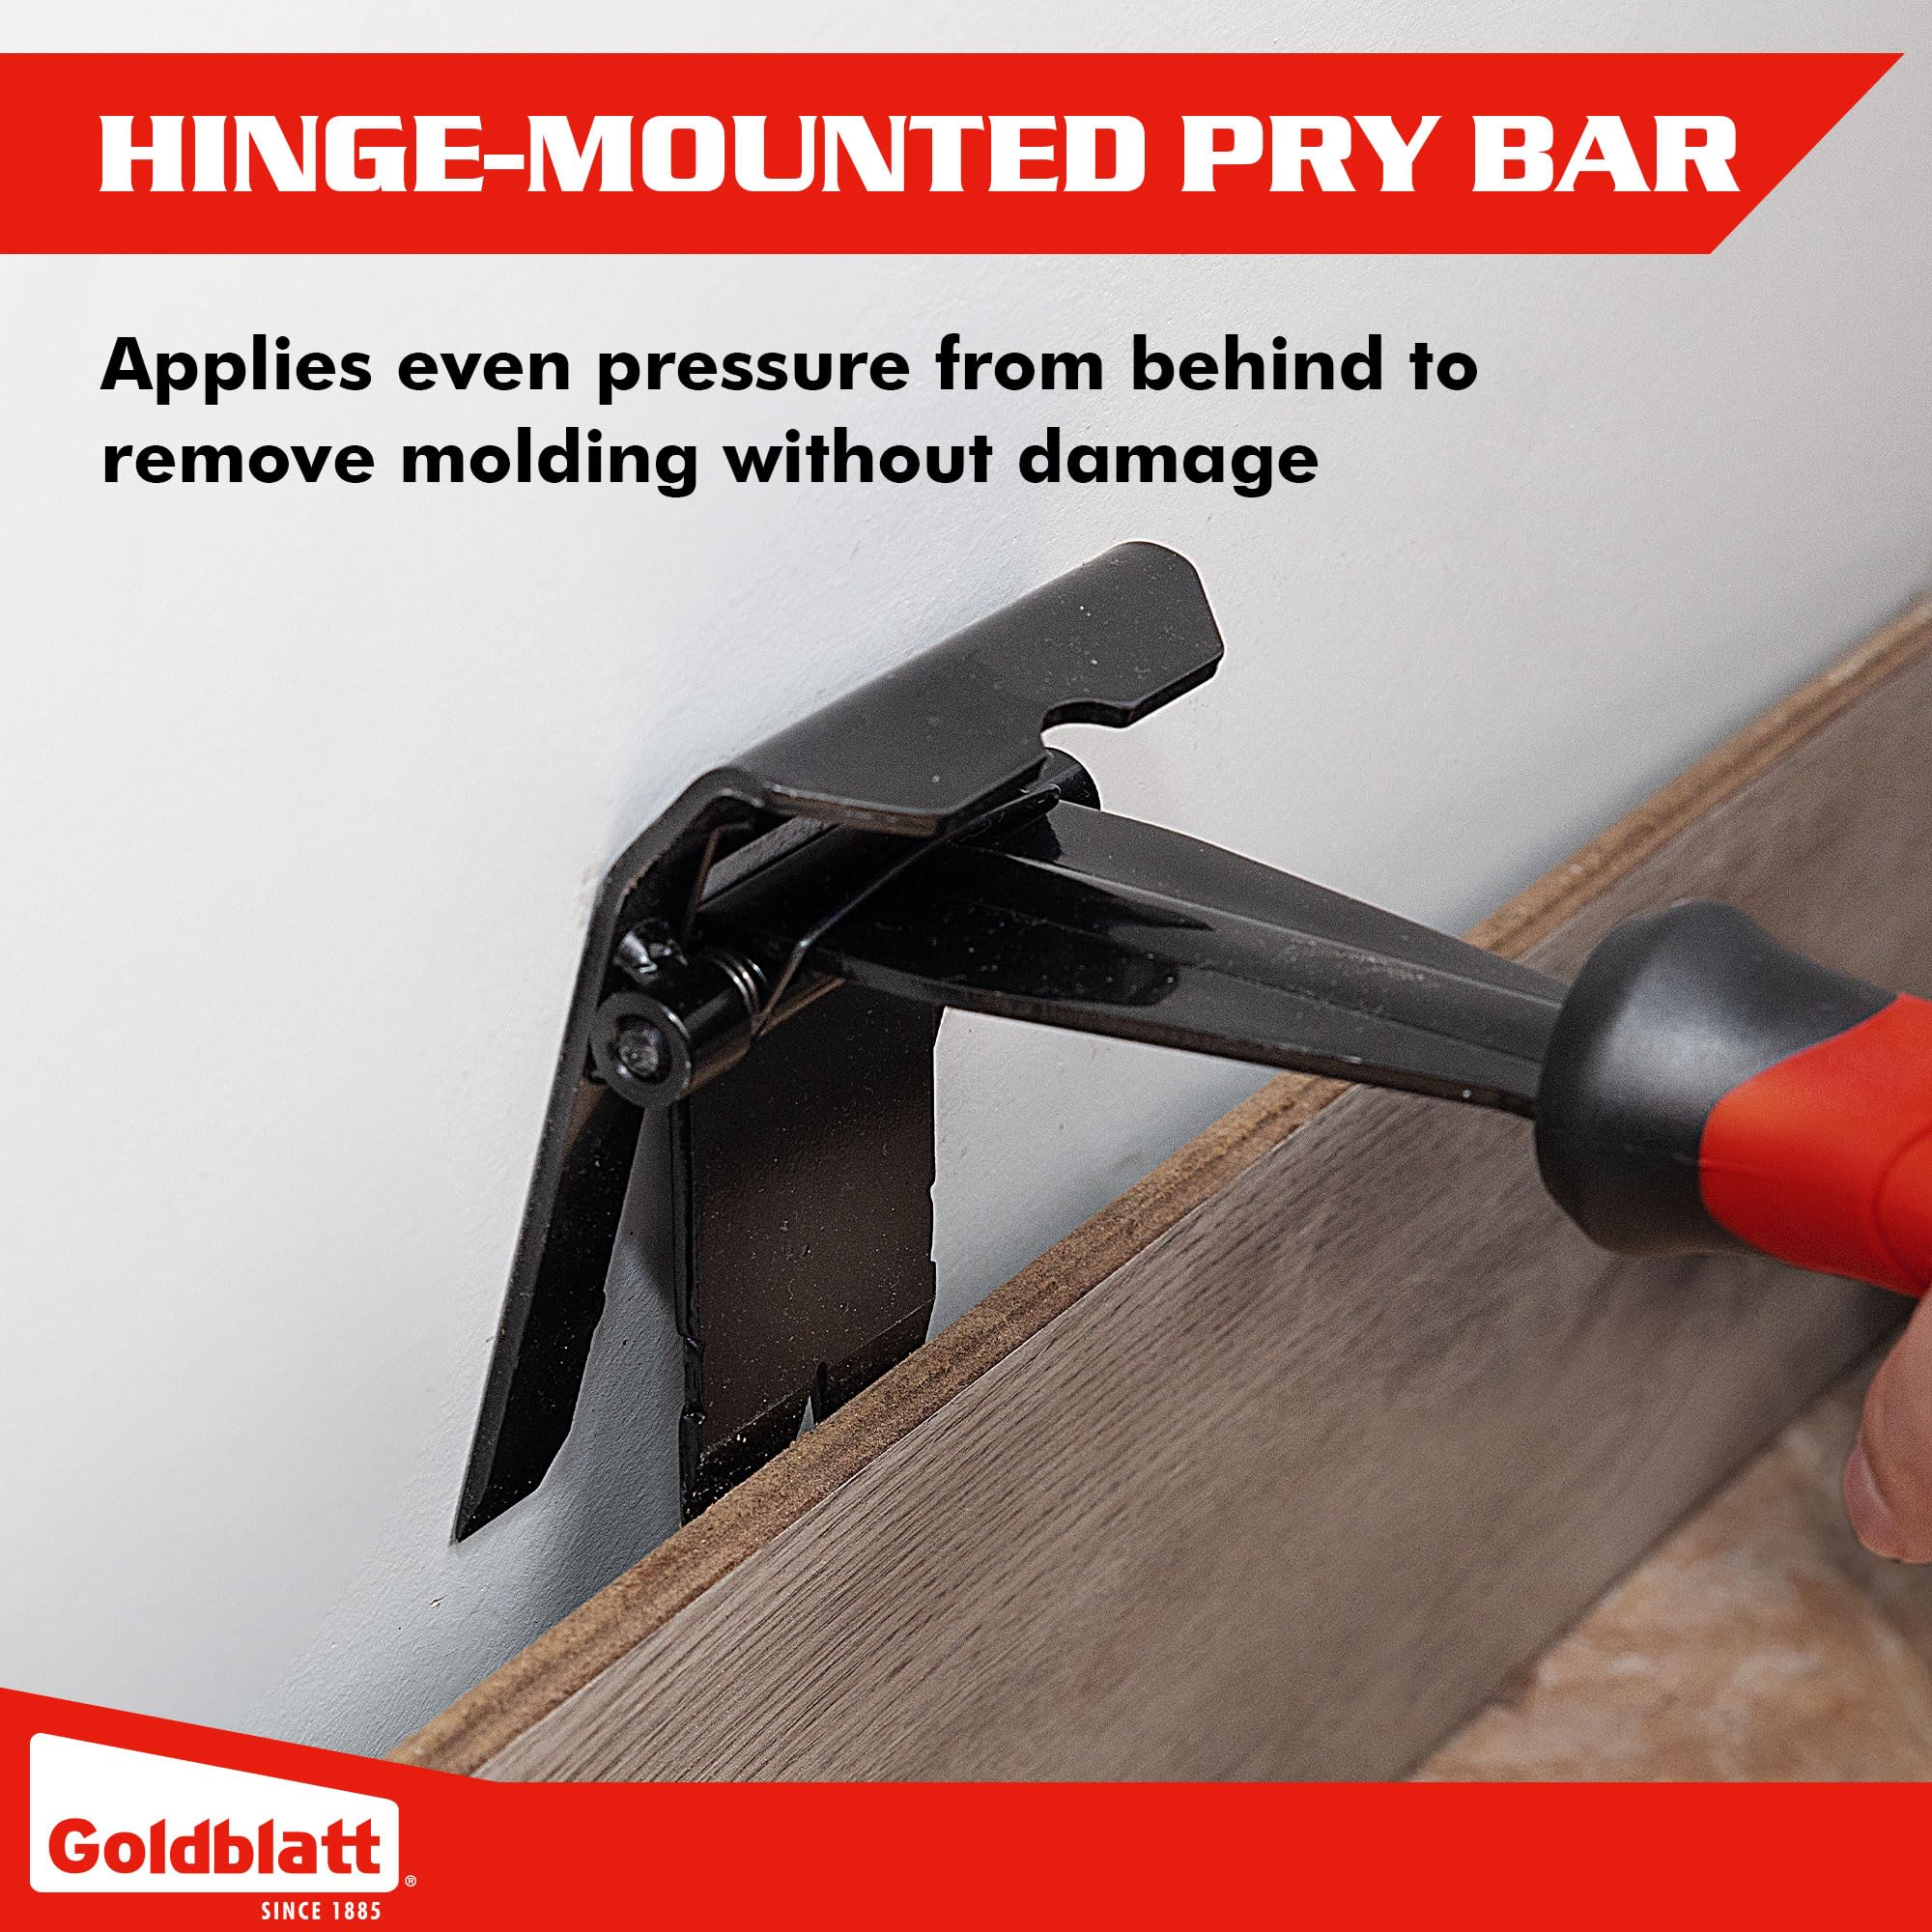
If you have ever tried prying off baseboards with a standard flat bar, you know the frustration of gouging drywall or cracking trim you wanted to reuse. This Goldblatt tool solves that with a wider, flatter head that spreads pressure across more surface area. The built-in spring is the real game-changer because it does half the separating work for you once you have wedged it in.
The carbon steel body feels solid in your hand, and the textured grip absorbs hammer blows without transferring shock to your palm. It is sized for precision work around cabinets, door frames, and tile edges where a full-size wrecking bar would be overkill. The 15-degree wedge angle slips behind trim more easily than blunt-edged tools.
If you want to remove trim and baseboards cleanly without patching a dozen wall dings afterward, this one delivers.
Styles it works with: Not decor-specific since this is a demolition tool, but useful for homeowners updating any interior style from Farmhouse to Modern.
Best placed in: Your tool kit for kitchen remodels, bathroom renovations, basement finishing projects, or anywhere you are removing existing trim and cabinetry.
May not suit: Homeowners who only need to remove one or two pieces of trim occasionally (a basic pry bar may suffice). Also not ideal for very thick or heavily nailed crown molding where a larger wrecking bar provides more leverage.
Buy it if:
- You are doing a kitchen or bathroom remodel and need to remove cabinets and trim without destroying drywall
- You are a contractor or flipper who removes baseboards and molding regularly and want to speed up the process
- You have tried standard pry bars and ended up with wall damage that cost more time and money to repair
Consider waiting if:
- You want to see verified customer reviews before committing since this product currently has zero reviews
Skip it if:
- You only need to remove one or two trim pieces and already own a basic pry bar
- You are removing very long baseboards or thick crown molding where a full-size wrecking bar provides better leverage
Check the latest price and availability on Amazon before it sells out.

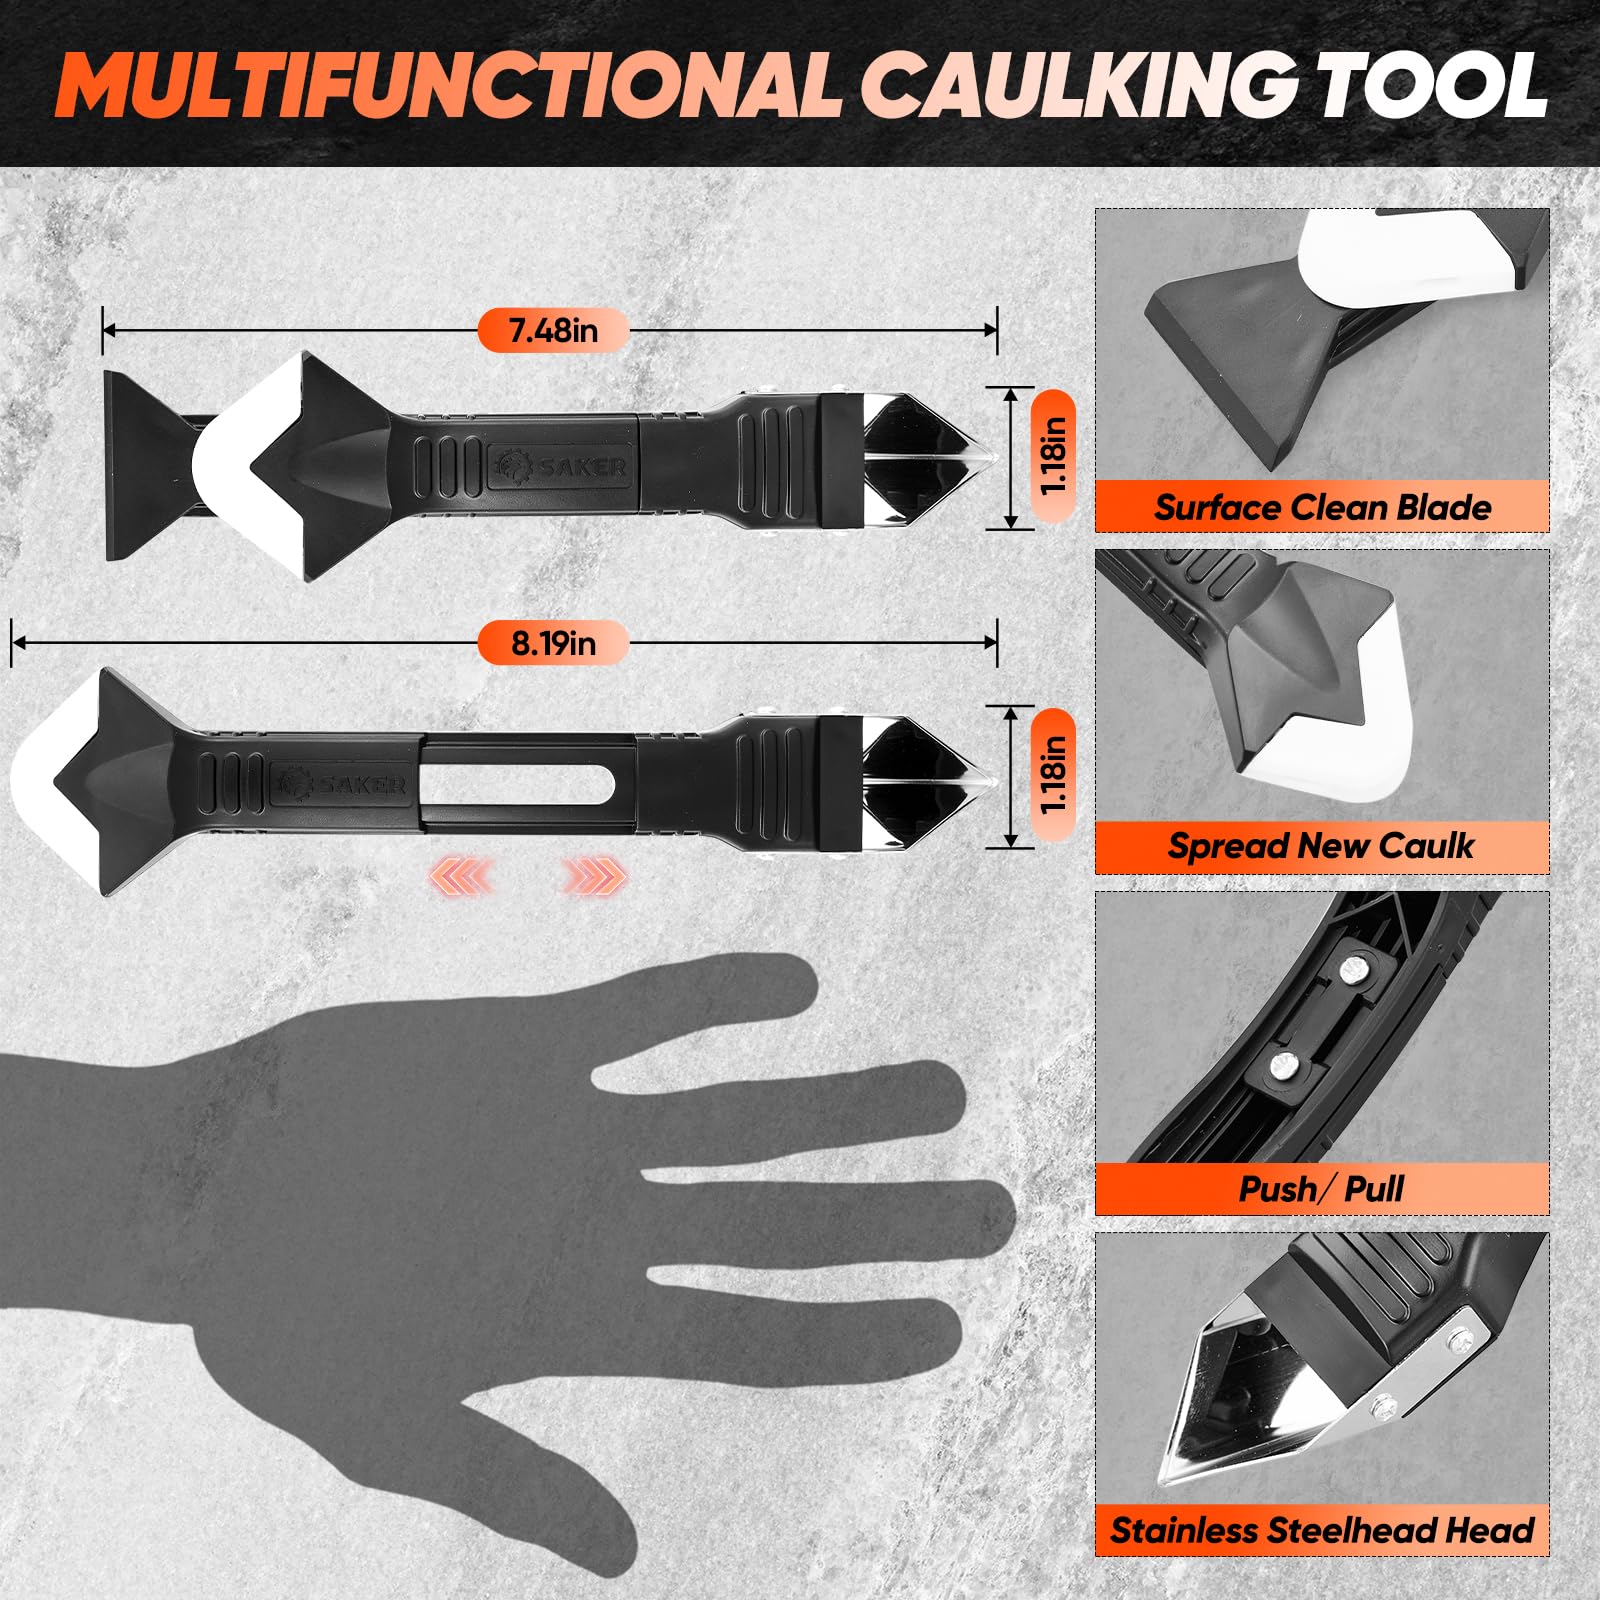
Saker 3-in-1 Caulking Tool - Stainless Steel Grout Remover & Silicone Smoother for Kitchen, Bathroom & Window Sealing
Pros
- Combines scraper, trowel, and smoother in one tool to reduce clutter
- Sharp stainless steel blade handles tough old caulk removal
- No masking tape required, speeds up the sealing process
- Lightweight and easy to maneuver in bathrooms and kitchens
- Affordable price point for a multi-function caulking tool
Cons
- Plastic end may wear down on cement or very hard surfaces
- Requires manual adjustment of screws to find the right glide tension
- Limited reviews make long-term durability harder to assess
This little tool solves one of the most frustrating parts of home maintenance: getting clean, professional caulk lines without spending an hour taping off surfaces. The Saker 3-in-1 does the scraping, smoothing, and finishing in one pass, which means your bathroom or kitchen refresh takes half the time.
The stainless steel scraper is sharp enough to dig out old, dried caulk without damaging tile or grout, and the silicone pads glide smoothly to create those crisp lines you normally only get from a pro. It fits easily in one hand, so you have better control around sinks, tubs, and window frames where precision matters.
If you want clean caulk lines without the tedious prep work of masking tape, this one delivers.
Styles it works with: Modern, Farmhouse, Minimalist, Traditional (universal tool for any interior style)
Best placed in: Bathroom vanity storage, kitchen utility drawer, garage tool organizer
May not suit: Commercial contractors who need heavy-duty grout removal equipment, or homes where the plastic end would be used frequently on concrete or masonry surfaces
Buy it if:
- You are resealing a bathroom, kitchen backsplash, or window and want pro results without hiring help
- You hate the mess and time spent applying and removing masking tape
- You need a compact, easy-to-store tool that handles multiple caulking tasks
Consider waiting if:
- You need to see more long-term durability reviews before committing
Skip it if:
- You primarily work on cement, brick, or very rough surfaces where the plastic end will wear quickly
- You need a powered grout removal tool for large-scale tile projects
Check the latest price and availability on Amazon before it sells out.
The WHLLING 4140 pry bar leads at a 4.8 rating and, like the AKGUN and BFXM 4140 pry tools at 4.7, is sold for automotive trim but works just as well behind a mirror clip or edge. The Goldblatt 3-inch trim tool at 4.7 has the widest blade here, best for spreading pressure on a glued sheet without gouging drywall. The Saker 3-in-1 silicone caulking and grout tool at 4.2 is the lowest and is really for the caulk-and-grout cleanup afterward, not the prying, so that band usually signals unit-to-unit variation.
Frequently Asked Questions
How do I know if my bathroom mirror is glued or clipped?
Check the edges. Visible metal or plastic clips mean it lifts out. Bare glass flush to the wall means it’s glued with mastic. A hollow tap near the edge suggests clips; a dead, solid sound means full adhesive.
Can I remove a bathroom mirror by myself?
It depends on size. A small clip-mounted mirror, yes. Anything over about 24×36 inches or glued flat needs a helper, since the glass is heavy and awkward and can flex and crack if you handle it alone.
How do I remove a mirror glued to the wall without breaking it?
Cut the adhesive, don’t pull. Slide a flat pry tool or a wire behind a top corner and work side to side, feeding shims into each gap. Go slowly, since old mastic is brittle and lets go suddenly.
Will removing a glued mirror damage my wall?
Usually yes. Mastic adhesive pulls off paint and a layer of drywall paper. Plan to patch and repaint that wall section afterward. A framed replacement mirror hides a rough patch better than a frameless one.
What tools do I need to remove a bathroom mirror?
A screwdriver for clips, plus a flat pry tool or bar for glued mirrors, wood shims, gloves, and safety glasses. Painter’s tape across the face holds the glass together if it cracks during removal.
Should I tape the mirror before removing it?
Yes, especially for a large or glued mirror. A large X of painter’s tape across the face keeps a cracked mirror from shattering into loose shards. It won’t stop breakage but contains it safely.
Can I reuse a mirror after taking it down?
It depends. A clip-mounted mirror comes off clean and reinstalls easily. A glued mirror often keeps hardened mastic on the back that’s hard to remove flat, so it may not sit flush on a new wall.
Bottom Line
For most bathroom mirrors, the job splits by mount: a clip-mounted mirror lifts out in minutes once the top clips are free, while a glued one means slowly cutting the mastic with a pry tool and shims. Tape the face, wear gloves, and use a helper on anything large. When a glued mirror won’t budge after patient prying, stop and call a pro before you crack the glass or tear open the drywall.


Write Your Review
No reviews yet. Be the first to share your experience!